Heat does weird things to plastic. After a house fire, your PEX supply lines might look fine at a glance, but radiant heat and soot can set you up for the kind of surprise leak that ruins a fresh paint job and your weekend. This quick field guide explains how heat and soot beat up PEX and fittings, what inspectors actually flag, how we pressure-test post-fire, and how to decide when a smart, targeted repiping beats a patch so you are not tearing open finished walls a month from now.
What Heat And Soot Do To PEX
PEX is tough for a plastic, but it is still plastic. Most PEX is rated for continuous service around 180 to 200 degrees Fahrenheit. A structure fire throws radiant heat that can exceed that at distances that surprise people, including inside wall bays and attics that never saw open flame. That kind of exposure can relax the cross-linking that gives PEX its memory, flatten round pipe into an oval, and make it lose flexibility. At fittings, heat can be even nastier. Copper crimp rings can anneal and loosen their grip. Stainless rings can distort. Expansion sleeves and plastic insert fittings can soften or creep, which is a fancy way of saying the joint can look seated and still be one shower away from a drip.
Then there is soot. Smoke deposits VOCs and SVOCs that love to cling to plastics. Those residues can etch or embrittle surfaces over time and can leave lingering odors if the system is not cleaned, flushed, and disinfected. In short, even if nothing looked melted, a hot, smoky environment can quietly downgrade your plumbing from reliable to roulette.
Inspector Red Flags
Good inspectors do not just look for the obvious scorch. They run through a mental checklist that focuses on how PEX and fittings behave after heat and soot exposure. Discoloration is a big one. Fading, chalky patches, soot staining that does not wipe clean, or a glossy area where the pipe briefly softened are all tells. Loss of flexibility is another. Healthy PEX has a little give. Heat-worn PEX feels stiff, creaks when flexed, or shows small surface cracks at bends. Joints get special attention. Rings that spun during the fire can look perfectly aligned and still be under-gripping the pipe. Expansion connections can have sleeves that crept back, or fittings that look seated but do not hold pressure. Finally, location matters. Inspectors check that lines near flues, B-vent, chimney chases, water heater draft hoods, and recessed lights meet required clearances and that any firestopping around penetrations was restored correctly. If the system fails any of those sniff tests, a pass on cosmetic appearance does not mean it is safe.
How We Pressure-Test After Fire
Air testing is loud and risky. Water testing is boring and honest, which is exactly what you want. We hydrostatically test repaired and suspect sections, then expand outward if needed. The goal is to stress the system higher than normal without exceeding what the pipe and fittings are rated to handle.
| Item | Typical Practice After Fire |
|---|---|
| Medium | Water-filled system with all air bled out |
| Test pressure | About 1.5x normal operating pressure within ratings, often 80 to 110 psi for residential cold lines |
| Stabilization | 10 to 30 minutes to settle temperature and absorb minor pipe stretch |
| Hold time | At least 15 minutes after small repairs, but 2 to 4 hours on heat-exposed zones or overnight if anything looks marginal |
| Pass criteria | No visible seepage and no meaningful drop. As a rule of thumb, anything like a 5 psi loss over 2 hours calls for investigation |
| Documentation | Photos of gauges at start and finish, notes on sections isolated, plus photos of fittings and rings |
We also purge and flush lines after testing to remove soot particles and residues. If smoke infiltrated the plumbing chase, a disinfectant flush is smart before you put the kitchen back in service.
Patch Or Targeted Repiping?
Patch repairs make sense when damage is truly isolated. Think one short section near a scorched stud bay or a single ring that obviously slipped. The pipe is still flexible, the color is consistent, rings elsewhere look right, and a pressure test on that branch holds with zero drama. That is a good patch candidate.
Targeted repiping wins when heat touched multiple fittings or long runs, the pipe feels brittle, you see ovalized pipe that will never seal rings correctly again, or when the suspect section will be buried behind expensive finishes. If you have already chased one or two post-restoration drips, do not kid yourself. Replace the whole affected zone from clean, testable endpoint to endpoint. It costs more today and usually saves thousands in tear-back, mold remediation, and insurance headaches later. Many policies that cover fire damage will approve replacement of fire-damaged plumbing when the loss and the compromised materials are documented, so take pictures and keep your test logs.
Field Examples
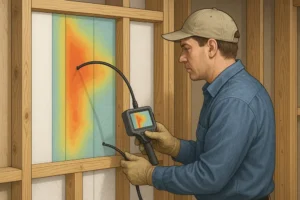
Kitchen range fire, no visible melting. The south wall chase read 210 degrees on a thermal camera sweep during the event. After the rebuild, a 90 psi water test on the hot branch dropped 6 psi in 90 minutes. Two copper crimp rings near the range bay were sooty and could be rotated by hand. We replaced 22 feet of 1/2 inch hot PEX, all fittings in that bay, and retested the entire manifold at 100 psi for 4 hours with no drop. No callbacks.
Attic electrical fire in summer. The attic PEX looked fine but felt stiff in a 15 foot run over a hallway. The cold line passed a quick 20 minute test at 90 psi, but the client was planning to close the ceiling with level 5 finish. We recommended targeted repiping for that attic section based on brittleness and location risk. We swapped the run, protected new lines with proper clearances from can lights, and tested overnight. That little bit of prudence prevented a nightmare later.
Garage water heater flare-up. Heat scorched the first 4 feet of hot and cold PEX off the heater. The rings were visibly discolored. We replaced both drops with rated copper stubs and heat shields to meet clearance requirements, transitioned to PEX in a cooler zone, and tested the whole house at 100 psi for 3 hours. That hybrid approach limited the scope and hardened the most heat-prone area.
Code And Insurance Notes
Codes require that materials be used within their ratings and that clearances from heat sources are respected. That means no PEX crowding flue pipes or draft hoods, correct fitting types, and proper firestopping at penetrations. If heat likely exceeded ratings or fittings were compromised, that is a material defect, not a cosmetic issue. Insurers commonly cover sudden fire-related damage to plumbing, but they love documentation. Photograph discolored pipe and rings, record test pressures and times, and have permit and inspection cards handy. If you are switching materials near appliances, use listed transition fittings and follow manufacturer instructions for clearance and shielding.
Quick Checklist
When we are called in after a fire, we map the affected zones, flag every fitting within radiant range of the fire room or attic hot spots, and evaluate the plastic like a mechanic checks a tire sidewall. If the pipe looks off-color, feels brittle, or the crimp ring is anything but snug, that whole run goes on the replacement list. We hydro-test branches methodically. If a section passes a long hold with clean visuals and has zero red flags, we keep it. If not, we plan targeted repiping that stops at logical, accessible endpoints so any future service is simple and you are not gambling behind new drywall.
FAQ: PEX After A Fire
Can PEX that was near a fire be safely reused?
Sometimes, but only if it shows no material changes and passes a proper water pressure test. If there is discoloration, stiffness, flattened pipe, or any fitting oddity, replacement of the affected zone is the safer bet.
Is air testing faster?
Air testing is quicker but less safe and less reliable on plastics. Hydrostatic testing with water finds tiny leaks without the risks that come with compressible air. Use water.
What pressure should you test at?
Aim for roughly 1.5 times your normal operating pressure while staying within the pipe and fitting ratings. For many homes, that means around 80 to 110 psi with water, held long enough to be meaningful.
Do I have to replace the whole house?
Usually not. Targeted repiping focuses on the heat-exposed sections and suspect fittings. Whole-home repipes are for widespread damage, repeated failures, or when code or insurance requires a full reset.
Will insurance help pay for targeted repiping?
If the fire caused the damage and you document the compromised materials and test results, many policies will. Work with your restorer to provide photos, test logs, and a clear scope tied to the loss.