Suspected mold behind an old plaster wall creates an awkward choice: open the wall and risk destroying original material, or leave it alone and hope the musty odor is somebody else’s problem. Neither is a sound plan. A borescope cavity inspection gives restoration professionals a limited view behind the plaster through a carefully selected access point. It doesn’t fix the wall or prove that every dark spot is mold, but it can provide the evidence needed for controlled drying, selective removal, and historic plaster preservation.
The objective isn’t to save every square inch at any cost. It’s to find the moisture source, determine what remains serviceable, and remove only what can’t be safely cleaned, dried, or stabilized. Historic significance doesn’t make crumbling plaster structurally sound, but a water stain doesn’t justify stripping an entire room either.
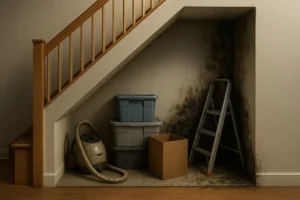
Why Mold Hides Behind Historic Plaster
Traditional flat plaster usually consists of multiple coats applied over wood or metal lath. When wet plaster was pressed through the spaces between wood laths, it curled over the back and formed plaster keys. Those keys hold the wall together. If they’re intact and the lath is sound, a wall with a stained or damaged finish coat may still be repairable.
Mineral-based lime or gypsum plaster isn’t always the main food source for mold. The rest of the wall assembly is less innocent. Wood lath, framing, wallpaper paste, paint binders, dust, animal hair in traditional plaster, cellulose patches, and cavity debris can all support growth when sufficient moisture is available.
Water also has an annoying habit of appearing far from its entry point. A failed chimney flashing can admit water at the roof, send it down framing, and produce a stain one floor below. A radiator fitting may leak only when the heating system runs. Condensation can form inside an uninsulated exterior wall without a plumbing failure. An impermeable paint or wallcovering can then slow evaporation and keep the back of the assembly damp while the room-side surface feels dry.
Common sources include roof and flashing defects, failed gutters, leaking pipes, window openings, masonry absorption, groundwater, rising damp, interior humidity, and previous flooding or fire-suppression water. The National Park Service guidance on unwanted moisture stresses diagnosis because repairing the visible stain without stopping the source usually buys you a cleaner-looking version of the same problem.
Reading Wall Clues Before Drilling
A professional investigation should begin with the building’s history, not a drill bit. We want to know when the odor or stain appeared, whether it changes after rain, what repairs have already been attempted, and whether the wall adjoins a bathroom, exterior masonry, chimney, roof transition, or mechanical system. Seasonal changes matter too. A damp spot that appears only during cold weather may point toward condensation rather than a leaky pipe.
The visual survey records water stains, peeling paint, loose wallpaper, efflorescence, rust marks, cracks, bulges, damaged trim, and soft or friable plaster. Light tapping can help identify hollow-sounding areas where plaster may have separated from its keys. That sound indicates possible detachment, not mold. If someone claims to identify mold by tapping a wall, skepticism is healthy.
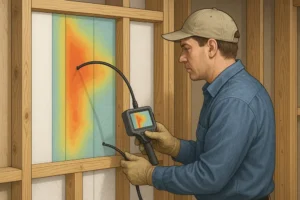
Moisture mapping adds another layer of information. Professionals may use pin meters, non-penetrating meters, indoor humidity and temperature readings, dew-point calculations, and infrared imaging. Every tool has limitations:
- An infrared camera displays surface-temperature differences. It doesn’t detect mold.
- A cool pattern might indicate evaporation, missing insulation, air leakage, masonry, or a thermal bridge.
- Pinless meters can react to metal lath, fasteners, salts, density changes, and wall thickness.
- A dry surface reading doesn’t establish that the wood lath or framing is dry.
Readings are more useful when they’re compared with similar, unaffected materials and placed on a wall-elevation map. That map can show stains, odors, moisture patterns, hollow areas, borescope entry points, and the locations selected for drying or removal. A single number without location or context isn’t much of a diagnosis.
Borescope Cavity Inspection
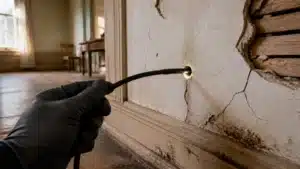
A borescope is a narrow camera on a flexible or articulating shaft. It can be inserted through a small opening to view concealed surfaces such as the back of the plaster, lath, framing, insulation, and debris. This follows the least-destructive investigation approach described in the National Park Service’s guidance for investigating old buildings.
The best access point is usually the one that causes the least loss while still answering a specific question. That might be a preexisting crack, an area of failed plaster already scheduled for repair, a gap behind removable trim, or an existing service opening. If a new hole is necessary, it should be placed in an inconspicuous area and kept only as large as the equipment requires.
Before drilling, the team must account for electrical wiring, plumbing, gas lines, HVAC components, decorative finishes, lead-based paint, and suspect asbestos-containing materials. An electrical box isn’t a convenient inspection hatch unless utility hazards have been evaluated and proper procedures are followed.
What the Camera May Reveal
A borescope can document missing or broken plaster keys, deteriorated wood lath, corrosion on metal lath, wet framing, condensation, insect damage, previous patches, insulation gaps, and water-travel paths. It may also show dark, fuzzy, spotted, or irregular material that resembles fungal growth.
Each useful image should be tied to a room, wall, height, distance from a fixed feature, camera direction, date, and nearby moisture reading. Otherwise, a dramatic close-up of a dark board might be nearly impossible to locate again. Documentation should describe what was observed rather than jumping to a laboratory-style claim.
What the Camera Cannot Prove
A borescope sees only what’s within its field of view. Lath, framing, insulation, and debris can block the lens from seeing nearby conditions. Dirt, soot, adhesive, corrosion, shadows, and old staining can resemble mold on a small screen.
The camera can’t identify a mold species, determine whether spores are viable, calculate airborne exposure, or assign a health-risk level. Until the evidence is interpreted in context, phrases such as “suspected fungal growth” or “mold-like growth” are more accurate than declaring a wall full of “toxic black mold.” Color alone doesn’t establish toxicity.
According to the EPA’s mold testing guidance, routine sampling is often unnecessary when visible mold is already present. Sampling can be useful when identification would change the work plan, an environmental professional has a specific question, or documentation requirements call for it. There isn’t a universal federal airborne mold limit that provides a simple pass-or-fail answer for every building.
Can Historic Plaster Be Saved?
Sometimes it can, and sometimes the honest answer is no. The face of the wall is only part of the decision. Professionals evaluate the finish and base coats, plaster keys, lath, framing, coatings, contamination, and access requirements. Decorative plaster, stenciling, murals, and rare finishes may also warrant an architectural conservator’s involvement.
The National Park Service’s historic plaster guidance favors repair over automatic replacement when original material remains serviceable. Historic plaster preservation makes good practical sense when the wall is firm, its support remains sound, and the assembly can be cleaned and dried without trapping contamination.
| Observed Condition | Likely Professional Response |
|---|---|
| Firm plaster, sound lath, declining moisture, and no significant visible growth | Correct the source, dry under controlled conditions, and monitor |
| Damaged finish coat with stable base coats and keys | Retain the base plaster and make a compatible localized repair |
| Detached but otherwise sound plaster | Evaluate stabilization or reattachment before considering removal |
| Limited accessible growth on cleanable material | Use containment, physical cleaning, drying, and documented evaluation |
| Contaminated debris or lath behind salvageable plaster | Create targeted access from the least significant side where feasible |
| Soft, crumbling, extensively detached, or persistently wet plaster | Selectively remove the material that isn’t serviceable |
| Decayed lath or framing | Open the minimum area required for structural repair |
| Sewage or highly contaminated water in the assembly | Use a more conservative removal and exposure-control plan |
Historic value isn’t a reason to retain material that can’t be made clean, dry, and stable. On the other hand, one failed corner isn’t evidence that every plaster key across the wall has broken. The removal area should follow documented damage, not the nearest convenient floor-to-ceiling line.
Controlled Drying Without Contamination
Controlled drying isn’t a household fan pointed at a wet wall. If mold-like growth or contaminated debris is present in the cavity, aggressive airflow can drive particles into occupied rooms or adjacent cavities. Drying equipment must be selected and positioned with pressure control, containment, filtration, material sensitivity, and moisture movement in mind.
The water source should be repaired or isolated first. Depending on the conditions, the drying plan may include water extraction, dehumidification, moderate temperature control, filtered air movement, and carefully designed cavity drying. Measurements are taken at regular intervals and compared with unaffected plaster, lath, or framing.
Historic plaster can react poorly to excessive heat or rapid, uneven drying. Those conditions may contribute to cracking, coating failure, salt movement, or separation between layers. Impermeable paint and vinyl wallcovering may also block evaporation, but removing them without testing can damage decorative finishes or release lead dust.
The familiar 24-to-48-hour drying guidance from the EPA’s homeowner mold guide is a prevention target for wet materials. It isn’t a promise that a thick plaster-and-lath wall will be dry in two days. Drying time depends on saturation, wall thickness, coatings, cavity layout, indoor humidity, temperature, and access to wet wood.
There’s no single moisture percentage that works for every lime plaster, gypsum plaster, wood lath, and masonry combination. A defensible drying endpoint relies on stable readings, comparison materials, dry lath or framing where measurable, acceptable indoor humidity, and confirmation that water is no longer entering. The wall shouldn’t be sealed because it feels dry to a hand held against the paint.
Selective Removal, Not Full Demolition
When removal is required, the purpose is to gain access to damaged material without sacrificing the sound wall around it. That usually means a contained work area, protected trim and finishes, marked removal boundaries, controlled cutting or hand removal, and support for loose plaster at the opening’s edge.
Adjacent plaster keys are surprisingly easy to break with vibration and enthusiastic hammer work. A small opening can become a large repair if the edges aren’t stabilized. Debris should be contained and bagged within the work area, while retained framing and lath are cleaned with appropriate physical methods, often including HEPA vacuuming. The cavity is then dried and evaluated before repair begins.
The EPA’s mold remediation guide explains that remediation is intended to remove contamination and prevent exposure, not merely kill organisms. Dead mold can remain allergenic. That’s why spraying bleach through a borescope hole isn’t a remediation plan.
Strong chemicals can also discolor finishes, affect metals, leave residues, or react poorly with historic materials. Routine bleach use isn’t recommended by the EPA as the primary mold-removal method. Moisture correction and physical removal of contamination still have to happen.
Once the retained assembly is clean, dry, and stable, the opening can be rebuilt with compatible lath and plaster. The repair should match the original plane, texture, and finish rather than creating a hard, mismatched patch that behaves differently from the surrounding wall.
Practices That Deserve Skepticism
Historic walls attract shortcuts because concealed conditions are inconvenient to verify. Some shortcuts fail because they treat appearance instead of cause. Others create extra contamination or destroy material that could’ve remained in place.
- Painting over stains or visible mold without correcting moisture
- Calling every black mark “toxic black mold”
- Using infrared imaging as proof of fungal growth
- Spraying bleach or fragrance into an unknown cavity
- Closing a wall after one dry surface reading
- Using household fans on exposed contamination
- Sanding mold-affected coatings without containment
- Removing every wall in the room “just in case”
- Applying impermeable coatings before understanding moisture movement
- Using ozone generators in occupied restoration work
None of these becomes more scientific because it’s delivered with confidence. A professional scope should connect each action to observed conditions, moisture data, material condition, and a defined objective.
Lead and Asbestos Before Drilling
An old plaster wall may contain hazards unrelated to mold. Pre-1978 paint should be treated as a potential lead concern until it’s properly evaluated. Paid work that disturbs painted surfaces in covered homes or child-occupied facilities may fall under the EPA Renovation, Repair and Painting Rule. Even a small inspection hole can disturb several layers of old paint.
Textured coatings, later patching compounds, insulation, pipe materials, and other concealed products may also contain asbestos. Building age alone can’t confirm its presence or absence. Suspect material shouldn’t be disturbed until an appropriately qualified person determines whether testing is required. The EPA’s asbestos guidance provides homeowner information about avoiding unplanned disturbance.
Mold, lead, and asbestos don’t share one interchangeable set of controls. Mold containment doesn’t automatically meet lead-safe work requirements, and neither replaces asbestos procedures. Local rules may also regulate mold assessment, remediation, disposal, or third-party verification.
Opening a contaminated cavity can expose workers and occupants to spores, fragments, dust, and debris. Isolation, controlled debris handling, gloves, eye protection, protective clothing, and respiratory protection may be appropriate. Workplace respirator use must follow applicable OSHA requirements.
Checking the Wall Before Closure
Repairing the plaster too early can conceal the same moisture problem that started the project. Before closure, the team should confirm that the leak, drainage defect, condensation issue, or humidity source has been addressed. Retained plaster, lath, and framing should meet project-specific drying criteria supported by recorded measurements.
The remediated area should be visibly clean, without remaining dust, debris, condensation, or mold-like growth. Persistent moldy odor calls for further investigation rather than a thicker coat of primer. Photographs, moisture logs, wall diagrams, and notes should show what was found, what was removed, and the conditions before the opening was repaired.
Air sampling isn’t mandatory on every project. If it’s used, there should be a defined question and a qualified person responsible for interpretation. A pile of laboratory numbers without a sampling strategy can make a straightforward project harder to understand.
No responsible restoration contractor should promise that a property is “mold-free” or diagnose a medical condition. People with asthma, mold allergies, immune suppression, or other health concerns should discuss exposure and occupancy decisions with a healthcare professional.
When to Call a Restoration Professional
Professional help is sensible when the odor or stain keeps returning, moisture appears after rain, plaster is bulging or soft, the cavity may contain widespread growth, contaminated water entered the wall, or decorative finishes are at risk. It’s also warranted when the project may disturb lead paint, asbestos-containing material, electrical systems, or a large concealed area.
A restoration professional should be able to explain what each inspection step is intended to answer. Ask how moisture will be mapped, where the access point will be placed, how contamination will be contained, what supports retaining or removing plaster, and how drying will be documented. If the proposed plan starts with stripping every wall before anyone looks for the leak, ask for the reasoning in writing.
All Nation Restoration can be contacted to discuss suspected mold, historic wall water damage, and an appropriate property assessment. A measured borescope cavity inspection can help define the affected area, but the real value comes from combining those images with moisture data, building history, material condition, and a repair plan focused on historic plaster preservation.
FAQs About Mold Behind Plaster
Can a Borescope Confirm Mold?
No. It can display suspected fungal growth and moisture-related damage, but it can’t identify species, establish viability, or quantify health risk. The images must be interpreted alongside moisture readings, odors, building history, and visible conditions. Targeted sampling may be appropriate when the result would change the scope of work.
Does Mold Mean All Plaster Must Go?
No. Firm, stable plaster may be retained while a smaller opening provides access to contaminated debris, lath, or framing. Plaster that’s soft, crumbling, extensively detached, structurally unsafe, or impossible to clean and dry may require selective removal.
Can Bleach Be Sprayed into the Cavity?
Spraying bleach into an unseen cavity doesn’t correct the moisture source or physically remove contamination. It can leave residues, affect sensitive materials, and create additional exposure concerns. Chemicals should never be mixed, especially bleach and ammonia-containing products.
Is Infrared Imaging Enough?
No. Infrared imaging shows surface-temperature patterns, not mold. It can help select areas for moisture testing or borescope inspection, but cool spots may also result from insulation gaps, air leakage, masonry, evaporation, or thermal bridging.
How Do Professionals Know It’s Dry?
They track readings over time, compare them with similar unaffected materials, measure accessible lath or framing, and confirm that the moisture source is no longer active. They also check indoor humidity, visible condensation, odors, and the condition of retained materials. One universal moisture percentage doesn’t apply to every historic wall.