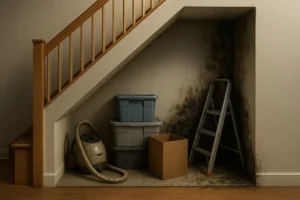
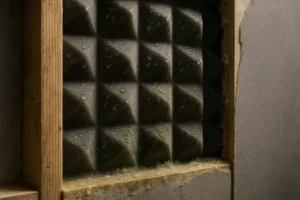
Cork handles an occasional splash better than some wall finishes, but that doesn’t make a cork-covered wall mold-proof. The tile is only the part you can see. Behind it are seams, finish, adhesive, drywall or plaster, insulation, framing, and sometimes an old layer of paint or wallpaper nobody knew was there. A clean tile face doesn’t prove that the backing, adhesive, or wall cavity is dry. Real salvage means confirming that the entire affected assembly is clean, sound, and dry, not giving the visible cork a quick wipe and hoping for the best.
Signs of Moisture Behind Cork Tiles
Hidden moisture often leaves clues before mold becomes visible. A persistent earthy odor is one of the more common warnings, especially when it’s strongest near a particular exterior wall, window, or plumbing fixture. Other signs include darkened seams, curling edges, loose tiles, bubbling finishes, stains, rusting fasteners, and adhesive that has become soft or gummy.
Pay attention to the wall beneath the cork as well. Drywall that feels soft, plaster that sounds hollow or crumbles, and trim that has swollen can indicate a larger moisture problem. Condensation on nearby pipes or repeated indoor humidity above 60 percent also deserves attention.
History matters. If the room recently had a roof leak, overflowing appliance, plumbing failure, wind-driven rain event, or window leak, assume water may have traveled farther than the visible stain. Water is remarkably good at ignoring property lines, furniture placement, and anyone’s preferred repair budget.
None of these signs proves how much mold is present. They do justify a closer moisture investigation. Mold color doesn’t reliably identify the species or hazard, so don’t let a dramatic dark spot distract from the practical question: Where did the water come from, and what did it wet?
How to Check a Cork-Covered Wall
Start by looking for the moisture source rather than shopping for a mold test kit. Check plumbing lines, drains, roof penetrations, window flashing, exterior cladding, cold pipes, foundation seepage, and exhaust systems. Bathroom, kitchen, and dryer exhaust should terminate outdoors rather than dumping moisture into a cavity or attic.
Compare the suspect wall with a similar wall that’s known to be dry. Mapping differences is usually more useful than taking one isolated reading and treating it like a courtroom verdict.
Pin and Pinless Moisture Meters
A pin-type moisture meter measures electrical resistance between two pins. It can help compare the suspect cork, drywall, or wood with an unaffected area of the same material. It does leave small punctures, and readings can be affected by salts, metal, adhesive, and the meter’s selected material scale.
A pinless meter is convenient for scanning a larger wall without puncturing it. It’s best used to find relative differences. It doesn’t produce a universal mold percentage, and high readings can be caused by pipes, wiring, metal studs, foil-faced insulation, or a dense adhesive layer.
For example, a high pinless reading in a perfectly straight vertical line may be moisture, but it may also be a metal stud or plumbing pipe. A broader irregular pattern below a stained window is more suspicious. Either result calls for verification rather than instant certainty.
Thermal Imaging
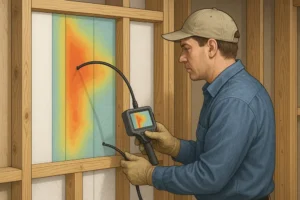
An infrared camera shows surface-temperature differences. It doesn’t see mold and doesn’t directly see water. A cool patch may be caused by evaporation from wet material, but missing insulation, air leakage, or a thermal bridge can create a similar image. A normal thermal image also doesn’t prove that insulation or sheathing inside the wall is dry.
Thermal imaging is useful when it guides follow-up inspection and meter readings. It’s much less useful when someone waves a camera at the wall and announces that the blue area is mold.
Borescope Inspection
A borescope can reveal stained drywall, wet insulation, deteriorated backing, or visible growth through a small opening. However, it can’t inspect every concealed surface. Creating the opening can also release particles from a contaminated cavity.
If a test opening is needed, choose the location carefully, check for wiring and plumbing, control dust, and keep vulnerable occupants away. Don’t drill blindly near outlets, switches, or suspected pipes.
Why Testing Isn’t Usually First
Routine air sampling is often less useful than finding the leak. There isn’t a single federal indoor mold-spore limit that declares every room safe or unsafe. If growth or water damage is already visible, the priorities are to stop the moisture, determine what’s affected, remove or clean damaged materials, and verify drying.
Sampling can have a role in disputes, sensitive facilities, unclear contamination sources, or a professionally designed post-remediation assessment. It shouldn’t replace an inspection. A lab result won’t repair a leaking window or remove wet insulation.
Can Moldy Cork Tiles Be Salvaged?
Sometimes, but the standard should be higher than “the front cleaned up nicely.” Cork contains suberin and may tolerate incidental surface moisture better than paper-faced gypsum. It’s still a plant-derived material, and dust, adhesive, finishes, and underlying wall components can support mold when moisture persists.
Salvage is most reasonable after a short, clean-water event when the affected area is small, the tiles remain flat and firm, and spotting is limited to a cleanable exposed surface. The source must be permanently corrected, the manufacturer’s cleaning instructions must allow the proposed method, and the substrate and cavity must be accessible for inspection.
Installed cork presents a practical problem: you can’t clean or inspect the hidden side without lifting at least some material. Even if the tile itself looks reusable, old adhesive may stay damp or hold contamination in pits and ridges. A tile isn’t truly salvaged if it’s reinstalled with moldy adhesive residue or a lingering musty odor.
| Condition | Likely Action | Reason |
|---|---|---|
| Light surface spotting after brief condensation | Evaluate for cleaning | Contamination may be limited to the exposed finish |
| Mold at seams with elevated wall readings | Remove selected tiles for inspection | Moisture may have entered behind the finish |
| Growth on tile backing or adhesive | Remove affected tiles | Hidden surfaces can’t be reliably cleaned while installed |
| Substantial growth on drywall paper | Remove affected drywall as appropriate | Paper-faced gypsum is absorbent and difficult to restore |
| Wet batt or cellulose insulation | Remove wet or contaminated insulation | It blocks inspection and slows cavity drying |
| Mold on sound structural wood | Get a professional assessment | Sound framing may be cleaned and dried using controlled methods |
| Swollen, crumbling, or curled cork | Discard it | Physical deterioration prevents dependable reuse |
| Sewage or contaminated floodwater | Favor professional removal | The hazards extend beyond an ordinary clean-water leak |
When Cork Tile Removal Makes Sense
Cork tile removal is generally the safer choice when mold is visible on the backing, adhesive, drywall paper, insulation, or framing. Removal is also warranted when tiles are swollen, stained through, curled, delaminated, or crumbling. Those changes show that the material or bond has been damaged, even if the front can be made presentable.
Strip the affected area when the wall has been wet for an unknown period, moisture readings remain elevated, the adhesive has failed, or a musty odor returns after surface cleaning. The same applies when the wall can’t be inspected or dried with the cork in place.
Contaminated water changes the risk calculation. Sewage, groundwater, and floodwater can carry biological and chemical contaminants that aren’t addressed by ordinary surface cleaning. Wet porous materials exposed to this water are poor salvage candidates.
Removal doesn’t always mean stripping every cork tile in the room. A controlled test opening may establish the boundary of the damage. From there, removal should continue until clean, dry, undamaged material is reached. If each newly opened section reveals more damp adhesive or stained drywall, the repair boundary needs to grow too.
How to Remove Cork Tiles Safely
Before disturbing the wall, stop the leak and estimate how large the affected area may be. Keep children, pets, and medically vulnerable people out of the work zone. Wet walls can also contain electrical hazards, so outlets, switches, wiring, and hidden plumbing need to be considered before cutting or prying.
Older construction adds another concern. Cork removal may expose painted surfaces or unknown adhesive. Homes built before 1978 may have lead-based paint beneath the tiles. Unknown legacy adhesives and backing materials shouldn’t be sanded, ground, or aggressively abraded until regulated materials have been considered. The EPA’s lead-safe renovation guidance and asbestos precautions explain why creating uncontrolled dust is a bad experiment.
For a small, limited cleanup, basic protection commonly includes an N95 respirator, non-vented goggles, compatible gloves, and clothing that can be cleaned or discarded. An N95 helps reduce particle exposure, but it doesn’t protect against chemical vapors, gases, or oxygen-deficient conditions.
Photograph the wall before disturbance, protect furnishings, cover nearby HVAC openings, and create a direct debris path outdoors. Shut down or isolate air movement that could distribute dust when it’s safe to do so. Don’t point a household fan at suspected mold before contaminated materials have been contained or removed.
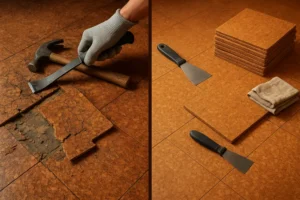
- Begin at an already loose edge or make a small, controlled test opening.
- Use hand tools where possible and avoid dry sanding or grinding.
- Remove cork in manageable sections without soaking the wall.
- Place contaminated pieces directly into durable bags or sealed containers.
- Inspect each tile’s back, the adhesive, and the exposed substrate.
- Expand removal until the remaining assembly is clean, dry, and undamaged.
- HEPA vacuum and damp wipe the controlled area as appropriate.
Some tiles will come off intact. Others will split, crumble, or take drywall paper with them. Reuse depends on tile thickness, age, adhesive type, installation method, and the amount of water damage. Anyone promising that every tile can be saved before seeing the backside is making a guess.
Cleaning the Wall After Removal
Cleaning should physically remove contamination. It doesn’t repair the moisture source, restore deteriorated drywall, or dry insulation inside the cavity. On compatible cleanable surfaces, common methods include HEPA vacuuming, damp wiping, and detergent with water. Sound structural wood may sometimes be cleaned using controlled abrasion, but that work calls for appropriate containment and professional equipment.
Substantially moldy drywall paper, deteriorated fiberboard, and contaminated insulation usually need removal rather than heroic scrubbing. These porous materials trap growth below the exposed surface and can fall apart when cleaned. The EPA’s home mold cleanup guidance also advises that absorbent moldy materials may need to be discarded.
Bleach isn’t a substitute for removal and drying. Spraying it into a wall doesn’t correct a leak, remove contaminated adhesive, or make soggy gypsum structurally sound. Don’t saturate cork, drywall, or a cavity with cleaning solution. Never mix bleach with ammonia or other cleaners.
Even dead mold and fragments may remain allergenic or irritating, which is why physical removal still matters. Painting, caulking, or sealing over visible growth isn’t remediation. It’s concealment with a receipt.
If a cork tile appears reusable, follow the manufacturer’s instructions, test the cleaner in an inconspicuous spot, and clean every accessible side without soaking it. Dry the tile separately from the wall. Don’t reinstall it if it remains musty, soft, curled, stained through, or contaminated with deteriorated backing or adhesive.
Wall Cavity Drying That Works
Wall cavity drying starts with source control. A dehumidifier can’t outwork an active plumbing leak, and air movers won’t repair failed window flashing. The source may be a supply line, drain, roof, exterior penetration, cold pipe, missing insulation, air leak, foundation seepage, or consistently high indoor humidity.
Cork and some adhesives slow evaporation. Vinyl coatings, foil-faced insulation, and low-permeance paint can do the same. That means a wall may feel dry from the room while insulation, sill plates, or exterior sheathing remain wet.
Effective wall cavity drying usually requires enough material removal to expose the affected assembly. Wet insulation that blocks airflow or can’t be restored should be removed. Contamination should be cleaned before aggressive air movement begins. Otherwise, drying equipment can distribute spores and fragments into occupied areas or the HVAC system.
Once the area is controlled and contaminated material has been removed, dehumidification lowers the moisture in the air while carefully directed circulation supports evaporation. Restoration professionals also monitor temperature, relative humidity, and material readings to determine whether the equipment is actually producing progress.
The commonly cited 24 to 48-hour period is a prevention benchmark. EPA guidance recommends drying wet materials within roughly that window to help discourage mold growth. It doesn’t mean a wall is automatically moldy at hour 49, and it certainly doesn’t mean running a fan for two days proves the cavity is ready to close.
When Is the Wall Dry Enough?
There’s no single safe moisture percentage for every wall. Wood, gypsum, plaster, and masonry use different measurement scales. Meter brands and settings vary, while salts, metal, adhesive, and surface conditions can distort results.
A better dry standard compares affected material with the same type of material in a nearby unaffected location. For example, wall framing beside a leak should be compared with similar framing in a known-dry section of the building, not with a random internet number. Readings should trend downward and then stabilize near the appropriate baseline.
Before reconstruction, inspect slow-drying areas such as bottom plates, corners, sheathing interfaces, and material overlaps. The cavity should be visibly clean, odor-free, structurally sound, and dry at more than one convenient measurement point. Indoor relative humidity should also be under control.
Keep photographs and drying records. They help establish what was removed, where readings were taken, and when the assembly reached its dry target. Reinstalling cork over unexplained elevated readings is just reserving the same problem for a later date.
How to Prevent Mold From Returning
Keep indoor relative humidity below 60 percent and preferably around 30 to 50 percent when the climate and building allow it. Use bathroom and kitchen exhaust fans that vent outdoors, and make sure the clothes dryer does the same. Insulate cold pipes where condensation forms.
Repair roof, plumbing, window, and cladding leaks promptly. Maintain gutters, downspouts, grading, and drainage so water moves away from the building. Recurring staining or odor warrants investigation instead of another coat of sealer.
Allow the wall sufficient drying time before installing replacement cork. Use tile and adhesive approved for the location, follow acclimation requirements, and don’t install over a substrate with unexplained moisture readings. Check seams and penetrations periodically, particularly around windows, exterior walls, and plumbing.
Be cautious with blanket advice to add a vapor barrier. Vapor-control design depends on the climate, insulation, interior finish, and exterior wall materials. Putting a low-permeance layer on the wrong side of an assembly can trap the moisture you’re trying to prevent.
When to Call a Restoration Company
Professional assessment is the safer option when contamination extends inside a wall or HVAC system, the source is unknown, sewage or floodwater is involved, or structural wood is soft and decayed. It’s also appropriate when demolition requires large containment areas or the wall may contain lead paint, asbestos, or another regulated material.
People with significant asthma, mold allergies, chronic lung disease, or immune suppression shouldn’t participate in demolition. The CDC’s mold guidance notes that damp environments can cause respiratory and skin symptoms and may present added risks for susceptible people. Symptoms should be discussed with a qualified medical professional rather than diagnosed from a stain on the wall.
EPA materials use about 10 square feet as a point for consulting more detailed remediation guidance, but that isn’t a universal legal threshold. State licensing rules and project requirements may differ. Texas property owners can check the current Texas Mold Program before starting a larger project or hiring an assessor or remediator.
If you need help locating hidden moisture, planning cork tile removal, or completing measured structural drying, All Nation Restoration can assess the affected wall and build a repair plan around the actual moisture source rather than the stain you can see.
FAQs About Cork and Hidden Mold
Can Mold Grow on Cork Wall Tiles?
Yes. Cork has moisture-resistant properties, but it isn’t immune to contamination. Mold may grow on dust, finishes, adhesive, tile backing, drywall paper, insulation, or framing. Persistent moisture is the controlling issue.
Can Cork Tiles Be Removed and Reused?
Sometimes. A reusable tile needs to remain flat, firm, odor-free, and free of contamination on every accessible side. It also needs to come off without severe damage. Tiles with failed finishes, internal staining, curling, softness, or stubborn contaminated adhesive should be discarded.
Does Bleach Fix Mold on Cork?
No. Bleach doesn’t fix the leak, remove damaged porous materials, or dry the wall cavity. Depending on the cork finish, it may also discolor or damage the tile. Physical removal, compatible cleaning, source repair, and verified drying are the priorities.
How Can I Tell if Mold Is Behind a Wall?
Musty odors, lifted seams, stains, soft drywall, loose adhesive, and elevated moisture readings can justify opening the assembly. Moisture meters, thermal imaging, and borescopes are screening and inspection tools, but none can prove the entire wall is mold-free by itself.
How Long Does Wall Cavity Drying Take?
Drying may take several days or longer depending on how much water entered, which materials became wet, the wall design, indoor conditions, and how quickly the source was corrected. Completion should be based on stable material readings and inspection rather than a fixed number of days.
Can I Use a Fan to Dry Mold Behind Cork?
Not before controlling the work area and removing or containing contaminated material. Unplanned airflow can spread spores, fragments, and dust throughout the room or into HVAC ducts. Air movement should support a controlled drying plan.
Should Wet Drywall Behind Cork Be Replaced?
Drywall that was briefly damp may sometimes be dried if it remains sound and clean. Material with substantial mold growth, damaged paper, crumbling gypsum, swelling, or contamination from sewage or floodwater generally requires removal.
What Moisture Reading Is Safe for Cork?
There isn’t one universal number for every wall or meter. Compare readings with the same material in an unaffected area, account for the meter’s scale and limitations, and confirm that readings stabilize at an appropriate dry baseline before reinstalling tile.
Do I Need a Mold Test Before Removal?
Usually not when visible growth and moisture damage are already present. Finding the source, defining the affected materials, and controlling removal are more useful first steps. Testing may be warranted for unclear conditions, disputes, sensitive facilities, or a specified post-remediation assessment.
Can I Paint the Wall After Mold Cleanup?
Only after contamination has been physically removed, damaged materials have been addressed, the source has been repaired, and wall cavity drying has been verified. Paint shouldn’t be used to cover active growth, debris, odor, or unexplained moisture.