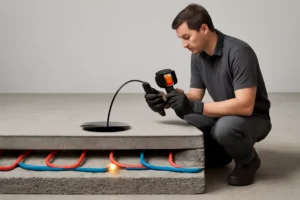
That warm-toes luxury you love can turn into a silent swamp if a hydronic radiant loop springs a leak. You may not see a single puddle while your slab and subfloor drink up water like it is happy hour. Before you picture a contractor in safety glasses revving up a jackhammer in your living room, take a breath. Modern hydronic floor forensics and desiccant injection drying let us find and fix the problem without turning your slab into rubble. Here is how we handle radiant leaks with smarts, not sledgehammers.
Why Radiant Leaks Hide
Hydronic radiant leaks are sneaky because the tubing is buried in concrete or under layers of finished flooring. Unlike a supply line break, a radiant loop leak often seeps into capillaries in the slab or wicks under underlayment where air rarely circulates. Evaporation through the finish layer can keep the surface looking normal for weeks while the assembly below saturates. The heat of the system can also mask moisture by warming and drying the surface even as deeper layers get wetter. This is why homeowners notice odd temperature streaks or musty odors long before they ever see a drip.
Early Red Flags
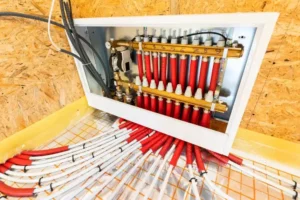
Radiant leaks have a calling card if you know what to look for. Flooring starts to misbehave. Floating planks may cup or crown at the joints. Vinyl tiles can loosen at one side of the room first, usually along an exterior wall where vapor pressure pushes outward. Rugs feel damp or stubbornly clammy in one zone. There is a stale, earthy odor that intensifies when the system runs or right after a cold snap. If you put your palm on the floor, you might feel a weird hot streak where it should be even, or a cool blotch that never warms up. At the manifold, the pressure gauge may show a slow drop over days, and you might hear faint gurgling from air intrusion in a loop.
Hydronic Floor Forensics
We do not guess. We prove. Hydronic floor forensics is a measured approach that confirms if there is a leak, shows which loop is guilty, and points to the precise spot where opening the surface actually makes sense. The trick is using multiple tools together so each one checks the other.
Pressure Testing Without Guesswork
Step one is isolating and pressure testing the loops at the manifold. Depending on the system and code in your area, we test with air or water at a pressure recommended by the tubing manufacturer and your installer. A common practice is testing at 1.5 times the normal operating pressure. Many installers use 60 to 100 psi during construction to weed out defects before the pour. On an existing slab, we verify the safe test range for your specific tubing and fittings and set the test accordingly. If you go with air, treat it with respect. Compressed gas stores energy. We isolate loops, use a quality regulator, and keep people away from gauges and fittings while the system is under pressure.
If a loop will not hold steady pressure, we have confirmation there is a leak. If all loops hold, we pivot to looking for other sources such as slab vapor drive or a nearby domestic water line. Either way, the pressure test gives us a yes or no before we start chasing ghosts.
Infrared That Tells the Truth
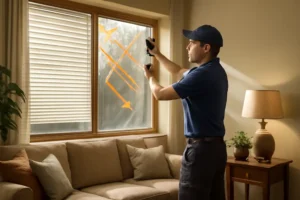
Thermal imaging cameras let us see heat signatures through finished flooring. Picture a heat map of your tubing. When a loop is circulating warm water, intact tubing looks like tidy lanes. A leak distorts the pattern. You might see a fuzzy hot bloom where hot water is escaping and pooling or a persistent cool spot where evaporative cooling is happening at the surface because moisture is wicking upward. We boost contrast by running the system to create a temperature differential between the slab and the room, or we isolate a suspect loop and energize only that zone. On some floors, we remove a couple of panels or baseboards to limit insulation effects and get a truer read. The IR scan does not punch holes. It just steers us in the right direction.
Acoustic And Tracer Gas Tools
Sometimes your ears beat your eyes. With quiet conditions and the loop under test pressure, sensitive ground microphones or ultrasonic listening devices can pick up the hiss of water or gas escaping. We start in a grid pattern and hone in on the loudest point. For the surgical strikes, we bring in tracer gas. By purging water and filling the loop with an inert tracer like helium or a 95 percent nitrogen and 5 percent hydrogen forming gas blend, then sweeping the surface with a detector, we can find the exact exit point. The gas migrates up through microcracks faster than water and lights up the sniffer right above the defect. Forming gas at 5 percent hydrogen is non-flammable in air and has a small molecule that is incredibly easy to detect. Helium works well in spaces where ventilation is limited. Tracer gas is the cheat code for precision without demolition.
Quick Comparison: Non-Destructive Leak Finds
| Method | What It Shows | Best Use | Limitations |
|---|---|---|---|
| Pressure Test | Confirms leak exists and which loop is leaking | First step at the manifold | Does not give location by itself |
| Infrared Scan | Temperature anomalies along tubing path | Large-area, non-invasive mapping | Needs thermal contrast and clean surfaces |
| Acoustic Listening | Sound of leak under pressure | Pinpointing in quiet environments | Background noise can mask signals |
| Tracer Gas Sniffer | Exact gas exit point above slab | Tiny or intermittent leaks, finished floors | Special equipment and controlled setup |
Jackhammer-Free Dry-Down
Finding the leak is half the battle. Stopping secondary damage without wrecking your slab is the other half. Our dry-down playbook is built for assemblies that do not appreciate brute force. If the finish is a floating floor over a slab, we start with surgical lifts. We remove only the necessary panels and underlayment in the mapped area to access wet layers and create airflow paths. If the floor is glued down or tile, we often keep it in place and dry through ports we create at baseboards, expansion joints, or grout pinholes that are easy to repair.
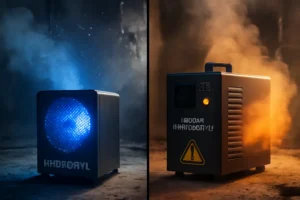
We pair high-efficiency air movers with commercial dehumidifiers and, when conditions demand it, dedicated desiccant units. Desiccant dehumidifiers do not rely on cooling coils. They pull water vapor from air using a moisture-absorbing wheel, then purge that captured moisture outside. The result is air that is extremely dry, often with dew points low enough to force moisture to migrate out of dense materials like concrete. That is the horsepower you want when a slab is soggy and the ambient is cool or humid.
Desiccant injection drying is where it gets smart. Instead of just throwing dry air at the room, we inject desiccant-processed air directly into the wet assembly through tiny ports. Think 3/8 inch holes behind baseboards, under toe-kicks, at the slab edge, or through carefully spaced grout pinholes. On the other side of the same assembly, we set a return path using a vacuum manifold or negative-pressure mats. Supply in, exhaust out. That pressure differential pulls dry air across the wet layers so moisture actually moves. It is precision airflow, not guess-and-hope. We seal off the work zone with plastic so the system is not trying to dry your entire house. Then we run it steady, monitor, and adjust. No jackhammer. No mess.
Where there are obvious water pathways or slab cracks that are acting like little rivers, we can add injection sealing. Specialized polyurethane or epoxy resins are injected into cracks or voids to shut down capillary movement. This is not injected into the hydronic loop. It is in the concrete itself, and only where the structure is leaking. We use it sparingly when controlling a water path is the difference between a 2-day dry-down and a 2-week one.
Surgical Access And Repairs
Once the instruments all sing the same note, we make the smallest possible opening. Often this is a single core drill cut, about 3 to 4 inches, dead center over the tracer gas hit or the peak of the acoustic signal. If the finish is tile, we pop a single tile in a grout-bound corner. If it is plank flooring, we lift a plank in the mapped zone. The idea is to reach the tubing without liberating a ton of slab. We expose the line, clean the area, and inspect. PEX leaks inside a slab are commonly from punctures during a later remodel, a screw that just kissed the tubing, a kink that finally split, or a heat-damaged section from torch work nearby.
Repairs are made with manufacturer-approved couplings rated for burial in concrete. That often means a barbed brass or polymer insert with stainless clamps or copper crimps, plus a protective sleeve so the joint is not in direct contact with alkaline concrete. We avoid gimmicky sealants inside the loop. Those stop-leak potions can gum up pumps and zone valves. After the fix, we retest the loop at the same pressure we used to diagnose. It needs to sit tight for a full hold period before we backfill the core. We patch the vapor retarder if one was present, then use non-shrink grout or a structural patch and bring the surface back flush. The whole surgical window is smaller than a dinner plate when done correctly.
Real-World Radiant Rescues
Case 1: Nail Meets Loop. A homeowner noticed a hot stripe under a new built-in bookcase and a faint musty odor. The gauge at the manifold was down 5 psi over a week. We isolated the suspect loop and pressurized to 60 psi. The loop dropped to 58 psi in two hours. The IR camera showed a fuzzy bloom in front of the bookcase. Acoustic listening put the loudest hiss at the left baseboard. We switched to forming gas and had a sniffer hit within 3 inches of a toe-kick, then cored a 3 inch hole. A finish nail from the cabinet install had grazed the tubing. We made a protected coupling, retested at 60 psi for 24 hours with no drop, then patched the core. For the wet subfloor nooks, we drilled two 3/8 inch ports behind the baseboard, injected desiccant-processed air on one side, and pulled a return on the other. Drying to targets took three days. The cabinet stayed put.
Case 2: Freeze And Thaw. A cabin with seasonal heat saw a deep freeze. In spring the owner found a slow drip at the manifold and some soft vinyl tiles. Pressure testing flagged two leaking loops. We traced both with IR and tracer gas. One leak was in an open hallway, the other under a bathroom wall. We lifted only four vinyl tiles in the hall and popped baseboard in the bath. Each leak was repaired through a single core. Using desiccant injection drying, we ran supply air at 15 to 20 percent RH into drilled ports and returned through a vacuum mat in the hallway. Concrete RH readings went from 92 percent to 78 percent in 96 hours, then to 72 percent by day five. We verified with in-situ probes before reinstalling new vinyl. No jackhammers. No do-over slab.
Case 3: Slab Vapor Plus Pin-Hole Leak. A homeowner blamed the radiant system for cupping on a floating floor, but the pressure tests held steady. IR revealed uniform tubing heat, and acoustic checks were quiet. Moisture mapping showed a gradient strongest along one exterior wall. We lifted two planks and found no free water, just high vapor at the slab. The culprit was a seasonal vapor drive, not a hydronic leak. We dried the slab with desiccant units and corrected the underlayment seams and perimeter gaps. We then added a loop map and labeled the manifold for future sanity checks. Sometimes the best radiant repair is proving the radiant is not guilty.
Proving It Dry Before Rebuild
The repair is not finished until the numbers say it is. Concrete is fickle. A surface can feel dry while the internal relative humidity is still high enough to wreck adhesives or feed mold under floating floors. We use in-situ RH testing following ASTM F2170, setting sensors to the proper depth and letting them equilibrate. Different floor coverings have different RH limits, often in the 75 to 85 percent range, so we follow the flooring manufacturer’s specification for your exact product. We also log ambient temperature and grains per pound of moisture so we are not fooled by a cool, dry morning that looks better than the average day in your home.
For wood-based materials we track moisture content with pin meters and compare to known dry baselines or to unaffected areas. If we used desiccant injection drying, we seal the ports, replace baseboards or grout pinholes, and bring the finish floor back only after the readings are consistently on target for at least 24 to 48 hours.
Keep It From Coming Back
No one wants a sequel. A few simple habits protect your radiant system and your floors. Keep a photo or printed map of your tubing layout with loop numbers taped inside the manifold cabinet. Before anyone drills into a floor, check the map. Label the supply and return manifolds and the set pressure that is normal for your home. Glance at the manifold gauge monthly during heating season. A sudden drop begs a test before damage spirals. If you live where freezes happen, set low-temp alarms or leave the system on at a safe low setpoint. If the system uses glycol, test the concentration and inhibitor package on schedule. Consider smart leak-sensing tools on your domestic water system too. They do not monitor hydronic loops directly, but they reduce the odds that a separate supply leak gets blamed on the radiant or overwhelms your slab drying efforts.
Under floating floors, choose underlayments with real vapor control and sealed seams, and leave proper perimeter gaps so hidden moisture can vent toward conditioned air instead of stacking up under planks. After any water event in a radiant home, resist the urge to bake the floor to the moon. Overheating a wet slab can create vapor pressure that drives moisture laterally into walls and cabinets. Controlled, steady desiccant-based dry-down is faster and kinder than slam-the-thermostat tactics.
FAQ: Radiant Leak Detection And Drying
Can you really find a leak without tearing up my whole floor?
Yes. We combine manifold pressure tests, infrared imaging, acoustic listening, and tracer gas sniffers to narrow the leak to a palm-sized area. Then we make a tiny opening to repair. Full tear-outs are rare in a well-planned job.
What is desiccant injection drying, exactly?
It is a targeted dry-down method where we feed extremely dry air produced by a desiccant dehumidifier directly into wet cavities through small ports, then pull that air back out through a dedicated return. The pressure differential moves moisture out of dense materials faster than room-only drying. It is air we are injecting, not chemicals.
Is it safe to pressure test my radiant loops?
Yes when done correctly. We follow the tubing manufacturer’s limits and local code, use quality regulators and gauges, and keep the area controlled. Many systems are tested between 60 and 100 psi during installation. On an existing system we choose a safe test level based on your equipment and history. Air tests demand special care because compressed gas stores energy.
Will you have to replace my tile or hardwood?
Not necessarily. Tile can often be saved by accessing through a single tile or grout pinholes, then drying via injection. Floating wood floors can be surgically lifted and reinstalled if they have not permanently deformed. Glued hardwood may need selective replacement if adhesives have let go, but we only remove what we must.
How long does drying take after a radiant leak?
Small, localized leaks in a slab with accessible airflow paths can be dried to flooring-ready targets in 3 to 7 days using desiccant injection drying. Larger soaks, cold environments, and dense finishes can push that longer. We track moisture and RH daily and adjust equipment to hit the numbers as quickly as the materials allow.
Hydronic Floor Forensics Meets Repair Planning
There is a reason we preach jackhammer-free. Hydronic floors want a scalpel, not a sledge. By verifying the problem with pressure and thermal data, pinpointing with acoustics or tracer gas, and moving moisture with desiccant injection drying, we turn a would-be demolition into a targeted service call. When it is time to open up, we keep the hole small, use approved repair parts, and retest like we mean it. Then we prove the slab is dry to the core before the finish ever goes back. That is the difference between crossing your fingers and fixing the problem. If your radiant floor is acting shady, call the crew that uses hydronic floor forensics and saves the jackhammer for the driveway.