RVs and travel trailers are basically tiny houses on wheels with the humidity output of a steam room. One long shower or a pasta night and your windows sweat like they owe back taxes. Left alone, that moisture breeds mold, funky smells, and repairs that blow your trip budget. The good news is you can keep the inside dry, healthy, and road ready with smart travel trailer moisture control. This guide shows you how RV condensation prevention actually works in day to day life, plus what to do if mold has already crashed the party.
If you are staring at musty walls or a suspicious dark patch right now, skip the guessing and talk to a pro. Our team can help with mold removal services before small problems turn into an interior makeover you did not plan for.
Why RVs collect condensation
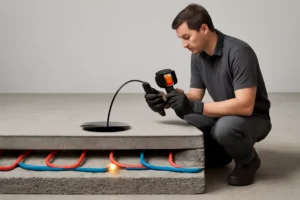
Condensation is simple physics. Warm moist air touches a cooler surface like a window or an exterior wall. When that surface is at or below the dew point of the air inside, water drops form. In a travel trailer you create moisture every time you breathe, boil water, cook, dry towels, or shower. The surfaces are thin compared to a house, so they cool fast on chilly nights and in shoulder seasons. That temperature swing invites water to settle on windows, wall panels, ceiling corners, and inside cabinets and closets.
RV brands and camping experts agree that you need to vent steam at the source and keep air moving to reduce that surface sweat. Winnebago lays out simple ways to reduce RV condensation. Camping World also explains why a small fan and humidity monitoring are your best friends for RV humidity control.
Daily habits that cut moisture fast
Most moisture problems start with everyday routines. A few small changes can drop your humidity inside and take the pressure off your dehumidifier. If you want effective RV condensation prevention, start here.
Run the range hood every time you cook and crack a window near the stove so steam has a fast exit path. If weather allows, cook wet foods outside when possible since boiling, simmering, and pasta water send humidity straight into the air. Winnebago notes that even opening cabinets during cooking helps warmer humid air spread out rather than trapping it inside small spaces while you simmer. You can see their practical suggestions on how to reduce RV condensation.
Turn on the bath fan before you shower and leave it running a few minutes after. Keep the bathroom door closed while showering so steam goes out the roof vent instead of fogging every window. Squeegee shower walls and floor when you are done to remove leftover water. That small move takes a surprising amount of moisture out of the air.
Avoid drying laundry inside unless you can run the vent fans and open windows. Wet towels hanging over doors and bunks are basically humidity machines. If you must dry items indoors, increase airflow and run your dehumidifier or air conditioner to help pull moisture out.
Wipe window and door condensation in the morning. It may feel tedious, but leaving water to drip into frames and wall panels is an invitation for hidden mold. For cool nights, insulated window covers or thermal curtains reduce window chill so you see less glass sweat in the first place, as Camping World points out in their guide on manage RV moisture.
Keep airflow moving behind and under mattresses and cushions. Elevate foam mattresses with a slatted platform or a breathable underlay so warm body heat does not condense against a cold plywood base. If you camp in cooler climates, lift the mattress edge each morning for a few minutes and let that space air out.
Watch interior humidity with a simple hygrometer. Aim for thirty to fifty percent relative humidity. KOA recommends that target range in their guide on how to prevent mold in your RV. If you are consistently over fifty percent, you need more venting and likely a dehumidifier or stronger moisture control steps.
Seal leaks and stop water entry
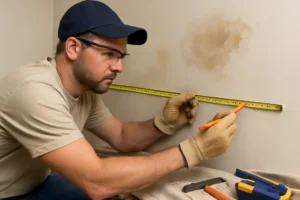
You can manage indoor humidity like a champ, but a single roof or window leak will undo all the good work. Seasonal inspection is key. Focus on roof edges, vents, skylights, antenna mounts, slideout seams, window seals, and any wall penetration for cables or plumbing. Look for cracks in sealant, soft spots, or staining on interior panels. Push gently on suspect areas. If they flex, there may be decay or water inside.
Inside the cabin, check under sinks and behind access panels for slow drips. Follow plumbing runs and feel for dampness. Look around the water heater and under the shower pan. Even tiny drips can add up in a compact space and feed hidden mold. Mold loves quiet dark places such as closets, storage benches, under beds, and inside tight cabinets. We see similar behavior in commercial lodging, and our page on hotel work shows typical hidden mold hotspots that also exist in RVs.
If you find standing water or a leak that soaked floors or wall cavities, act fast. Get water out, start airflow, and set up drying. For significant leaks or flooded flooring, our water extraction team can save materials and stop mold before it spreads. If damage is more than cosmetic, you can also reach our main services page at All Nation Restoration to plan repairs.
After a spill or leak
Soaked floor, ceiling drip, or storm damage inside the RV. Remove standing water, pull wet rugs and cushions, run fans, and if you have power, set a dehumidifier to a low humidity setting. If water reached insulation or wall cavities, call pros for water damage restoration and drying. Persistent dampness leads to hidden mold and soft floors. For full service help, contact All Nation Restoration.
Gear that makes moisture control easy
Yes, fans and open windows are great, but sometimes you need backup. A few smart tools keep humidity where it belongs and protect your interior in storage.
Portable dehumidifier
A small compressor style or desiccant style unit can pull a surprising amount of water out of the air. Use one while parked with shore power or a generator. Place it near the main living area or bath, and run a hose to a sink or shower if your model allows continuous drain. Dehumidifiers cut window sweat, help bedding dry faster, and support the thirty to fifty percent humidity target. Mortons on the Move breaks down practical ways to eliminate moisture in your RV, including using the air conditioner to dehumidify in humid climates.
Rooftop and window fans
Run the roof vent fan whenever you cook or shower. Add a second fan if you camp in colder months and prefer to keep windows mostly closed. Cross ventilation plus powered exhaust is a huge help to prevent condensation on cold walls and windows.
Hygrometer
Place a small digital humidity monitor near the center of the rig. Consider a second one inside a closet or under a bed, since those spaces often run wetter than the main room. If you always see readings above fifty percent, raise your vent fan usage and run your dehumidifier more often.
Desiccant packs for storage
When you store the RV without power, passive moisture absorbers like Dry Z Air or calcium chloride tubs reduce dampness. Tri Crown RV explains how and where to place them for RV storage moisture control. Use them inside closets, cabinets, under beds, and near the bathroom. Check and replace them as they fill up.
Insulated window covers and thermal curtains
Reducing cold glass surfaces keeps condensation off the windows at night. Pair covers with a slight window crack and the roof fan on low to keep air moving. Camping World covers this tactic and more for RV humidity control.
Under mattress ventilation
A breathable underlay or slatted base increases airflow under foam mattresses. That stops sweat and breath moisture from condensing against cold plywood. If you have persistent mattress moisture, add a small fan on a timer to move air during the night.
Storage strategies that actually work
Travel season ends, the rig sits, and that is when mold loves to move in. With a little planning, your RV will smell fresh when you open the door in spring instead of greeting you with a science project.
Dry it thoroughly before you park it. Clean and squeegee the shower, wipe condensation, and run a dehumidifier for a few hours. If you have shore power at the storage site, set the unit on a humidity target and let it run. If you store without power, use desiccant tubs and packs. Tri Crown RV explains how desiccant products help during long storage periods and where to place them for desiccant for RV storage.
Open interior spaces. Leave cabinet doors ajar. Lift mattress corners or use spacers so the area under the bed breathes. Prop the refrigerator and freezer doors open so they do not trap moisture and odors. KOA also recommends this and other smart steps to prevent mold in your RV.
Crack roof vents with vent covers that keep rain out. Even a small amount of airflow prevents stale air and reduces humidity. Avoid sealing the RV in plastic. It traps moisture. Use a breathable cover designed for your rig if you want exterior protection. Do a quick walk around once a month if possible. Swap out full desiccant tubs and look for new stains or soft spots after rain.
Safe cleanup for small mold spots
Sometimes even with good travel trailer moisture control, you find a small spot. Maybe a little patch on a window frame or a bit of fuzzy growth in a cabinet corner. You can usually handle small areas safely with the right approach and basic protection.
Suit up light and smart. Use gloves, eye protection, and at least a quality respirator rated for fine particles. Vent the area with a window open and the exhaust fan running. Avoid aggressive scrubbing that sends spores airborne.
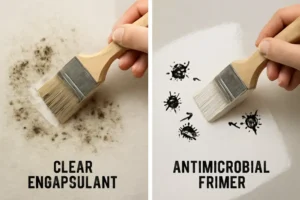
Clean hard non porous surfaces with a household cleaner or diluted white vinegar. For bathroom caulk or plastic trim, hydrogen peroxide can help. Never mix chemicals. Rinse and dry the area completely. Toss used wipes in a sealed bag. A small HEPA vacuum helps remove dust after cleanup. For more step by step detail, see our practical guide on how to spot and remove mold.
If the material is porous like untreated wood, carpet, raw particle board, ceiling panels, or foam, be cautious. Mold can root inside where wipes cannot reach. Limited surface growth may clean up fine, but if staining keeps returning or the material feels soft or smells musty, replacement is often the smarter route.
When mold covers more than about ten square feet, spreads across multiple locations, or you suspect it is inside walls or floor cavities, call a pro for mold remediation. RV interiors are tight spaces. Disturbing a large area without containment and proper filtration can make things worse.
What to do right after water intrusion
Storm blown window, roof seam failure, or a burst fitting can turn a cozy camper into a splash pad. Fast action keeps problems manageable.
First, stop the source of water. Then remove standing water with towels, a wet vacuum, or a small pump. Get airflow going with fans across wet surfaces. If you have power, run a dehumidifier and the air conditioner on a dry setting to pull moisture from the air. Open access panels so cavities can dry. Lift removable cushions and mattresses to allow air to reach both sides.
Inspect under flooring edges, at wall bases, and around slideouts. Water likes to sneak into insulation and hidden voids. If you see swollen panels or know water reached wall or floor cavities, our water extraction team can dry the structure and reduce the chance of microbial growth. Catching it early beats a full rebuild later.
Humidity targets that keep mold away
Most RV owners do not need complex math to beat mold. Maintain interior relative humidity in the thirty to fifty percent range, and ventilate well during any activity that adds moisture. A basic digital hygrometer tells you when things are drifting out of range. KOA recommends this target in their guide on how to prevent mold in your RV, and it lines up with real world experience. If you cannot stay in that range without constant fan use, check for hidden leaks or consider a larger dehumidifier.
Quick RV moisture checklist
Keep this list on your phone or print it for the cabinet door. If you want a printable version, reach out and we will send a tidy PDF.
- Run the range hood and bath fan during cooking and showering.
- Crack a window near steam and keep roof vents moving air.
- Wipe window condensation in the morning and after showers.
- Keep humidity near forty percent with a hygrometer and a dehumidifier.
- Open cabinets and lift mattress edges to air out tight spaces.
- Inspect roof seams, windows, slideout seals, and plumbing each season.
- Use desiccant packs in closets, cabinets, and under beds during storage.
- Prop the refrigerator doors open during storage.
- Call pros for leaks, standing water, or mold larger than a dinner plate.
When to call a professional
DIY is great for routine RV condensation prevention and small surface mold. There are moments when calling a pro saves time, money, and your sanity. Reach out for mold removal services if you have visible growth across multiple areas, musty odor that persists after cleaning, or any suspect staining after a leak. If water soaked insulation or wall cavities or you had a fresh water or roof failure, start with water extraction and structural drying. You can always contact All Nation Restoration for a fast assessment and next steps. If you want testing or third party inspection, look for a certified inspector in your state who does not perform remediation to keep it impartial.
FAQ
What relative humidity should my RV be?
Aim for thirty to fifty percent. Use a hygrometer and vent when you cook or shower. KOA backs that target and shares practical ways to prevent mold in your RV.
Will a dehumidifier prevent RV mold?
It reduces the risk a lot, especially when paired with venting during steam heavy activities and a tight building envelope with sealed leaks. Mortons on the Move lists dehumidifiers and air conditioners as top tools to eliminate moisture in your RV.
How do I dry out my RV after water intrusion?
Remove standing water fast, run fans and a dehumidifier, and open access panels so cavities can dry. If water reached insulation or structural layers, get professional water extraction and drying to limit hidden mold.
Can I clean black mold myself?
Small surface spots on non porous surfaces are usually manageable with proper protection and good ventilation. For larger areas or growth inside walls, call for mold remediation. Our DIY guide on how to spot and remove mold explains safe steps and when to stop.
Why do my windows sweat at night?
Warm indoor air meets cold glass, water forms, and it drips. Reduce indoor humidity with a dehumidifier, use thermal covers, and create gentle airflow. Winnebago offers practical ways to reduce RV condensation.
Should I crack a window while running the heater?
A slight opening plus a roof fan on low helps cycle moist air out without killing your comfort. Pair it with insulated window covers to keep heat inside while humidity exits.
Is bleach the right cleaner for RV mold?
Bleach is not a cure all, especially on porous materials. Use cleaners recommended for the surface, consider diluted white vinegar for non porous spots, and never mix chemicals. If the area is large or keeps coming back, call the pros.
Do I need mold testing?
Testing is not always necessary for small visible spots. If you want third party confirmation or have health concerns, hire a certified inspector who does not do remediation. After that, we can follow their protocol for cleanup.
What is the best desiccant for storage?
Calcium chloride tubs and Dry Z Air style products are common choices. Place them in multiple small spaces, check them monthly, and replace as they fill. Tri Crown RV shares smart placements for RV storage moisture control.
Keep rolling without the musty side quest
Travel trailer moisture control is a simple mix of airflow, smart gear, and routine checks. Vent during steamy activities, keep humidity around forty percent, seal leaks before they snowball, and treat small mold spots early and safely. Use a dehumidifier when you have power and desiccants when you do not. Store the rig dry with open cabinets and propped refrigerator doors. If leaks or mold get ahead of you, our team can step in quickly with mold removal services or water damage restoration. Ready for help or just want a quick plan for your rig. Contact All Nation Restoration and we will get you back to camping without the clammy cabin drama.