As a restoration pro who sees what fire and smoke do to homes, I love 3D printing, yet I respect the heat it produces. Desktop printers are small heaters with moving parts. That mix can go wrong without the right checks. This guide delivers practical additive manufacturing fire safety for home makers, schools, and small shops. You will learn how FDM printer thermal runaway protection works, how to verify it on your machine, how to set up safe enclosures, power, and monitoring, plus exactly what to do if a print catches fire. My aim is prevention first, fast action second, and professional recovery if damage occurs.
Why 3D printers can start fires
FDM printers melt plastic using hot metal blocks and heated beds. A heater cartridge in the hotend receives power based on feedback from a small temperature sensor known as a thermistor. When that feedback stops reporting correctly but the heater keeps getting power, temperatures can rocket past safe limits. That specific failure is called thermal runaway. The Marlin team explains it plainly. If the controller loses an accurate reading during a heating cycle and power does not cut off, heat can climb unchecked and cause smoke or fire. You can read the safety logic in the Marlin thermal runaway protection documentation for an authoritative description of this failure mode, along with the timers and thresholds that catch it. Visit Marlin thermal runaway protection.
Many printers run Marlin or a modified branch, which includes thermal runaway and heating failure checks. Those protections can be disabled, misconfigured, or missing in some vendor builds. Users who flash different firmware versions or change settings can also drop safeguards without realizing it. The fix is simple in concept. Confirm your specific printer ships with protective checks active and verify the values match safe defaults. Marlin documents how these protections work and how to configure the hysteresis windows and timeouts. See the Marlin configuration page linked above for authoritative details. Prusa has a clear end-user explanation of what a Thermal Runaway error means on a consumer machine and how the thresholds behave during real prints. See Prusa Thermal Runaway explained.
Thermal runaway is not the only ignition path. Faulty power supplies, loose bed connectors, damaged thermistors, stepper harnesses that rub raw, or a nozzle jam that keeps the heater on for long periods can all contribute. Community guides show how to test thermistor wiring, set proper strain relief, and run PID tuning to stabilize heating. Tom’s Hardware outlines common causes and fixes in plain language at How to check thermal runaway and thermistor wiring. A weak crimp on a heated bed connector can arc under load. A cheap wall plug can overheat. Small faults add up during long jobs.
One more note on additive manufacturing fire safety. Not every 3D printing process looks like a filament printer on a desk. Metal powder printers pose dust and explosion hazards that fall under NFPA standards such as NFPA 652 and NFPA 484. That risk model differs from hobby FDM. It calls for industrial controls and oversight by your local Authority Having Jurisdiction. If your facility handles metal powders, escalate your safety plan far beyond what this home and small shop guide covers.
Firmware and hardware safety checks
Before you focus on enclosures and extinguishers, confirm your printer senses heat correctly and reacts fast to any drift. Firmware safeguards plus hardware integrity remove the most common risks. Take the time to validate both. You will print with more confidence and fewer surprises.
Confirm thermal runaway protection is active
Identify the firmware your printer runs. Open source Marlin is the most common. Many consumer printers list the version under About Printer in the settings menu. If the vendor ships closed firmware, search the model and ask the maker community whether thermal protections are present. If you compiled your own Marlin build, open the configuration files and confirm the thermal protection options are enabled for both the hotend and the heated bed. The Marlin docs walk through these settings and the logic that triggers a fault when temperatures drift or stall. Start with Marlin thermal runaway protection.
Owners of Prusa models can read a plain English description of the Thermal Runaway error, including typical timeout values and how the printer recovers. That page is a good reference for understanding what you should expect to see when a fault occurs. Visit Prusa Thermal Runaway explained.
Run a simple validation. Heat the hotend to a typical target while you watch the live temperature readout. Nudge a fan toward the hotend to drop the temperature slightly, then block the fan. Confirm the graph shows controlled recovery without large swings or long stalls. If the reading drops sharply or spikes for no reason, investigate the thermistor bead placement and wiring. A secure sensor in clean thermal contact with the block gives steady readings.
Test thermistors, wiring, and run PID tuning
Thermistors are small. The leads can crack at the bead or the crimp. They dislike repeated flex. Move the wiring loom gently while the printer is idle and watch for any flutter in the reported temperature. No change should show with gentle motion. If the reading jumps, pull the hotend and inspect the harness. Replace any sensor with frayed insulation or loose crimps. Secure the wiring with proper strain relief so flex does not load the bead during travel moves.
Thermal stability improves with PID tuning. A well-tuned hotend reaches setpoint with minimal overshoot and holds temperature close during cooling airflow, long bridges, and retraction bursts. Marlin provides a built-in autotune command. Run PID autotune using the M303 G code while supervising the printer. The Marlin guide explains how many cycles to run and how to save the results in EEPROM. Repeat this after hardware changes such as a new nozzle, heater, or fan shroud. Warm-up stability reduces both false alarms and real hazards.
Do a bed heat check as well. Heated beds pull significant current. Watch the temperature rise from room level to your PLA or PETG target. The climb should be steady without long stalls. If heaters run at full power with poor results, you may have an undersized power supply or a bed connector that is dropping voltage under load. That weak link can overheat at the connector. Investigate immediately.
Upgrade power supplies and secure connections
Low-cost supplies sometimes lack quality control. You do not need exotic gear, but you do want a supply with proper certifications and a housing that runs cool to the touch. If your supply whines or buzzes, or if the output voltage sags during heating, replace it with a reputable unit with clean output. Confirm the mains input wiring uses ring or fork terminals where the design calls for them. Tighten barrier terminals using the correct driver. Do not rely on bare wire under a screw head. Proper ferrules and crimps matter more than fancy accessories.
The heated bed cable deserves extra attention. Movement and heat can fatigue the copper. Look for darkened insulation near the connector, discolored solder joints, or a smell of burnt plastic after long prints. Any sign of heat damage requires action. Replace the connector or cable. Add a printed cable guide to reduce flex radius. Inspect the hotend heater cartridge cable for nicks from the part cooling fan or the gantry. Add a short length of braided sleeve where the loom rubs a sharp edge.
Safe setup, enclosures, suppression
Good placement reduces ignition sources and limits the spread if a fault occurs. Treat your printer like a small appliance with a heating element. Give it a safe home. Keep flammables away. Separate the electronics from loose, meltable items like filament bags or foam inserts. Keep the area tidy so you can see smoke early and act fast.
Set the printer on a non-combustible surface. Tile, a metal tray, or a concrete paver works well. Avoid bookcases, carpeted shelves, or pressed wood that can smolder. Keep curtains, paper rolls, and cardboard boxes out of the splash zone. Run with a clear perimeter so you can reach the plug without moving obstacles. If your electronics control box is separate, mount it where air can flow freely, and dust cannot pack around vents.
Enclosures make printing quieter and improve ABS or ASA results. They also let you contain smoke for a short window and add suppression that triggers automatically. Tube-style clean agent systems are popular for consumer enclosures. A sealed tube mounts along the top of the enclosure. If the flame heats the tube, it bursts at the hottest point and releases an agent that knocks down the fire. Brands like BlazeCut offer kits sized for desktop enclosures.
Automatic suppression reduces spread, yet it is not magic. Tube systems typically trigger when flame is present. They stop a small fire from growing, but they do not prevent heat damage to the printer or enclosure. Install per the manufacturer’s instructions. Match the agent volume to the interior volume of your box. Keep ventilation paths in mind. A large open vent can let the agent escape. Consider a safety enclosure that includes thermal fuses, a power cutoff, and mounting for a detector inside the box. Examples include vendors such as 3DUpfitters and 3DPrintClean. Review features and tradeoffs without locking yourself to one brand. The goal is containment and fast suppression, plus quick access for maintenance.
Do not store spares inside an enclosure. Remove solvent wipes, aerosols, paper towels, and spare filament spools. Keep spare batteries for cameras or lights away from heat. The risk from lithium cells differs from that of hot plastic.
Some makers add a fire blanket above the enclosure. That option can smother a small fire if pulled down carefully. Practice the motion once with cold equipment. Never smother a fire if you do not feel safe doing so. Call 911 and evacuate.
Power management and electrical safety
Most home printers draw modest current, but heaters pull in short bursts. That places stress on marginal wiring and power strips. Proper power management removes several common fire starters. Treat the printer like a space heater in how you feed it power.
Plug the printer into a quality outlet with a grounded connection. Avoid daisy-chained power strips. Use a surge protector with an internal breaker that cuts power when overloaded. If you have multiple heaters on one bench, consider a dedicated circuit installed by a licensed electrician. Keep cords neat and visible. Avoid running power cords under rugs or foam mats. Coil up excess slack so you do not snag the plug when the gantry moves.
Smart plugs and OctoPrint power relays help with remote shutdown. Choose devices rated for the current draw of a heated bed. Install the smart plug outside the enclosure so heat does not degrade it. Do not run the printer on a UPS unless you have a clear reason to finish during a short power loss. A UPS introduces another battery into the mix. If you use one for monitoring gear, size it correctly and position it away from the heat zone.
Heat from poor contact causes many small fires. After the first week with a new machine, check that the line and neutral screws in the terminal blocks are still tight. Vibration can loosen fasteners. Never overtighten to the point of stripping. Use the tool size the manufacturer specifies. Inspect plug blades for discoloration. Replace any cord set that runs hot or shows scorch marks.
Monitoring, alarms, automation
Even with good firmware and clean wiring, you want an early warning. The fastest way to catch a small event is a smoke alarm in the same room. Working smoke alarms cut the risk of dying in a home fire by a huge margin. The NFPA recommends smoke alarms inside each bedroom, outside sleeping areas, and on every level of a home. That guidance helps here too, especially if you run printers while you sleep or leave the house.
Test alarms monthly. Replace batteries on schedule. Vacuum dust from the vents during your shop cleanups. If you use a closed enclosure, consider an additional detector near the ceiling above the box. Smoke rises fast, so early detection can happen outside the enclosure even if suppression triggers inside. Heat detectors have a role in garages with dust and fumes, but do not let them replace smoke detection for this use case.
Remote monitoring helps if you cannot sit next to the printer during a long job. A simple webcam or a camera module connected to OctoPrint lets you check the print path and watch for smoke. OctoPrint and similar hosts offer plugins that detect failure patterns or let you stop the job remotely. Treat these as helpful tools rather than guarantees. A camera only sees what the lens can see. Notifications do not replace a person on site with a smoke alarm. Never rely on remote power off as your sole safety plan.
Good automation removes energy when something looks wrong. If your enclosure has a thermal fuse or a relay tied to a smoke detector, wire that to cut power to heaters. You can retain camera power on a separate circuit, so you still see the box after a shutdown. Label every switch and breaker so a family member can cut power fast without guesswork. Leave a small Class ABC extinguisher visible near the door to the room.
If a print catches fire
Act fast, but keep yourself safe. If you see flame or thick smoke, move people and pets out of the area. Call 911 from outside. Close the door to the printer room if you can do that without breathing smoke. That slows the spread. Do not take risks with live fire.
If the fire is very small and contained in the building area or enclosure, and you have been trained to use an extinguisher, you can attempt to put it out. Pull the pin, aim at the base of the flames, squeeze the handle, sweep side to side. Use a Class ABC or BC extinguisher. Keep the nozzle low and be ready for a second burst if embers re-ignite. If you are not fully confident or the fire grows, evacuate at once.
If you can reach the plug without placing your hand near smoke or flame, unplug the printer. Do not reach through thick smoke. If you have a master switch for the bench, hit that instead of reaching for a plug. Once out and safe, call the fire department even if you believe you put it out. Hidden embers can simmer in insulation or corrugated cardboard for a long time. A firefighter will confirm that the scene is safe.
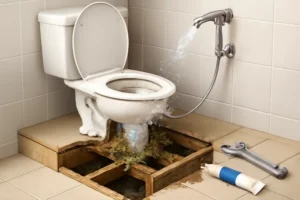
If your property has damage, our team can help get you back on your feet. We provide fire damage restoration with twenty-four-seven emergency response in Austin and nearby communities. Call us at (512) 934 8180 or use our contact page for immediate help. Small fires can create large odor and soot problems. Quick professional action protects your home and your health.
After a fire cleanup and restoration
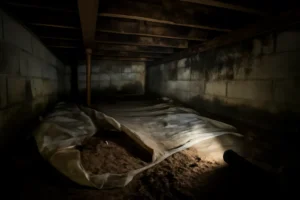
Plastic smoke behaves differently from kitchen smoke. Melted ABS and PETG create sticky soot that binds to paint, cabinets, and electronics. The residue can be acidic. It can corrode metals and foul contacts. Water or dry chemical residue from suppression can soak into drywall and flooring. Some residues keep releasing odor for weeks. A surface wipe rarely solves the problem. We have a guide to the hidden hazards after a fire that explains respiratory risks, corrosive residues, and why professional cleanup matters after any incident that produces smoke.
The first step is to ventilate if the fire department clears the site. Run fans to move air out of the affected room if it is safe to use power. Do not run HVAC until a professional inspects the air handler and ductwork. Soot can travel through the system and cross-contaminate clean rooms. Document the scene with photos for insurance, then place damaged items in bags to prevent tracking soot into clean areas. Avoid washing soot with water unless a restorer directs you to. Water can lock odor into porous surfaces and spread residue.
Fire suppression itself can create secondary damage. If water is used, fast extraction limits swelling in cabinets and floors. If an aerosol clean agent is discharged, you still need a wipe down and filtration to remove fine soot. We can evaluate the mix of residue, then set up air scrubbers with HEPA and carbon, and remove source materials. Cost varies based on the size of the affected area and the materials involved. For a sense of what drives pricing, see our guide to fire damage restoration costs. Our goal is to return your home to pre-incident condition with clean air and no lingering odor.
If a fire were contained inside an enclosure, you may think the rest of the room is fine. Odor can still cling to textiles and wall paint. A post-incident assessment helps you decide between focused cleaning and a broader plan. We can handle both. If you would like prevention tips for other common household ignition sources, read our practical guide to avoid fire damage at home.
Quick checklist for safer printing
Daily and weekly habits help more than any single gadget. Use this short checklist to build a safety routine that takes only a few extra minutes per session.
- Confirm your printer firmware reports that thermal protection is active. Read the section on Marlin thermal runaway protection for what to expect on a compliant build. If you own a Prusa, read Prusa Thermal Runaway explained.
- Run PID autotune with M303 when you change hotend parts or cooling. The Marlin M303 PID autotune page shows the steps.
- Inspect thermistor and heater wiring for frays or loose crimps. Replace any damaged harness. Review practical checks at How to check thermal runaway and thermistor wiring.
- Place the printer on a non-combustible surface. Keep the area clear of paper, foam, and boxes.
- Install a smoke alarm in the printer room. Follow NFPA smoke alarm recommendations. Test monthly.
- Consider an enclosure with automatic suppression. Review BlazeCut automatic fire suppression for enclosures and size the agent correctly for your box.
- Keep batteries, chargers, and spare power banks out of the enclosure. Read our lithium battery fire safety guide.
- Do not leave a printer running while you sleep if you can avoid it. If you must run long jobs, use cameras for quick checks and add local alarms for early warning.
FDM printer thermal runaway protection is your first line of defense. Safe placement and clean wiring reduce common ignition points. Enclosures with suppression limit the spread if a fault slips through. Working smoke alarms catch small fires early. Good power management supports all of this by removing hidden hot spots at plugs and connectors.
If a print job causes a fire and you need help after firefighters leave, call us for immediate fire damage restoration. We serve Austin and the surrounding areas day and night. Reach us at (512) 934 8180. Our team understands how printer smoke behaves in a home, how to treat plastic soot, and how to protect your family from residual toxins while we restore your space.
One final tip for those working with metal powders. Filament-based FDM hazards differ from combustible dust hazards. If your work involves powders, consult combustible dust hazards in additive manufacturing and follow NFPA standards with industrial-level controls. That path keeps people safe in settings very different from a home shop.
Safe prints come from a layered approach. Firmware checks, sound wiring, reliable power, clean enclosures with suppression, local alarms, and a plan for quick action form a strong safety stack. Additive manufacturing fire safety does not need exotic gear. It needs attention to detail and habits that stick.