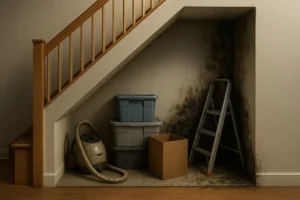
If you scrubbed, HEPA-vac’d, and dried your way through a mold job, the last thing you want is a paint job that peels like a sunburn or a comeback tour of Cladosporium. Picking between encapsulant coatings and antimicrobial primers is not about which label sounds tougher. It’s about what you’re painting over, how clean and dry it is, and whether the surface can actually hold a coating without turning into a biology experiment.
What Are You Painting Over?
Two different tools, two different jobs. Encapsulant coatings are physical barriers that lock down cleaned surfaces so any leftover microscopic fragments do not aerosolize or colonize. Think polymer shield, not bug spray. Antimicrobial primers contain EPA-registered agents to kill or inhibit growth on the surface. They do not magically make bad substrates good, and they are not a substitute for demolition where porous materials are trashed with growth. In a proper project, you often use both in sequence after cleaning and drying, but only where the material and conditions match the label.
Encapsulant vs Antimicrobial Primer
| Encapsulant Coatings | Antimicrobial Primers |
|---|---|
| Physical barrier that seals in residual spores or hyphae after cleaning. | Chemical action kills or suppresses organisms on the surface. |
| Best for structural wood, concrete, masonry, crawl space members after thorough prep. | Best for hard or semi-porous surfaces that will get a cosmetic finish coat. |
| Use when removal is infeasible and colonization was shallow and cleaned. | Use as a preventive layer where moisture risks are controlled but not zero. |
| Not a workaround for wet, damaged, or highly porous materials with deep growth. | Not a workaround for required removal per standards or code. |
| Often vapor-permeable options available for wood or masonry that need to breathe. | Typically designed to be painted over with standard finish coats. |
Prep That Makes or Breaks It
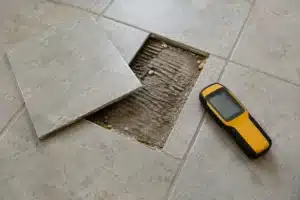
Mold-safe painting only sticks to the script if you actually write the script. Fix the moisture source first, whether it’s a pinhole in a supply line, a sweating duct, vapor drive through a cold wall, or a blocked crawl space vent. If you can still smell that basement salad, you’re not ready to coat. Clean mechanically with HEPA vacuuming and agitation so you remove visible growth and debris. Detergent washing or appropriate biocidal cleaning comes before coatings, not after. Then dry the substrate thoroughly. Wood should read in a normal range for that species and environment, often in the low teens percent moisture content. Concrete should be visibly dry and not show new efflorescence. A moisture meter or data-logging RH beats the old knuckle tap every time.
Before you go all-in, conduct an adhesion check. The simple X-cut tape test on representative spots tells you if you’ve still got chalky dust, invisible film, or incompatible chemistry hanging around. Follow the coating manufacturer’s test method if they specify one. Fail the tape test, and your coating is going to fail you.
Porous Materials You Replace
Drywall, insulation, and carpets that have visible growth or have been wet long enough for colonization are not candidates for encapsulation or priming. They get removed and replaced. Period. Semi-porous structural stuff like framing can stay if growth was shallow, you can clean it to a sound surface, and moisture is controlled. The line is depth. If mold has penetrated deeply into fibers, coating over it just grafts a paint film to a problem you can’t see.
When to Use an Encapsulant
Reach for an encapsulant when you have cleaned, dry, sound wood framing, masonry, or concrete that you are not tearing out. Crawl space girders after a plumbing leak. Basement masonry after efflorescence cleanup and dehumidification. Attic sheathing once roof leaks and bath fan ventilation are corrected. Pick a product that is vapor-permeable when the substrate needs to breathe, and make sure it is rated for the environment you’re putting it in. Follow the manufacturer’s mil thickness and cure window. Too thin and you do not get the barrier. Too thick and you invite cracking or extended soft cure that gums up your schedule.
When to Use an Antimicrobial Primer
Use an antimicrobial primer when you need a paintable base coat on cleaned, stable surfaces and want a little extra suppression of strays. Think bathroom ceilings that used to grow freckles because the fan dumped steam back into the room. Think basement stairwells where RH creeps high in summer. If you are in a regulated market like Texas, the product needs to be EPA registered and used exactly as the label says. Verify the EPA Reg. No. on the can. These primers are helpers, not hall passes, and they rely on your humidity control to stay effective long term.
Application That Actually Sticks
Control the room first. Keep temperature and RH in the coating’s comfort zone so the film forms correctly. Vacuum and tack the surface so you are not painting over dust that turns your project into a scratch-off ticket. Prime or pre-wet as directed by the product’s TDS when dealing with thirsty substrates like old framing or block. Work methodically and do not rush recoat times. Cure means cure. When the TDS lists a 24-hour cure at 70 F and 50 percent RH, your cold, damp basement does not get a pass.
Topcoats matter too. Some encapsulants want to be left as the final film. Others want a compatible finish. If you are painting over an antimicrobial primer, pick a topcoat the primer brand says will stick. Cross-brand roulette is how otherwise decent projects end up shedding like a snake.
Mistakes That Cause Regrowth
Coating over damp or cool-to-the-touch surfaces traps water in the pores. That moisture will push off your film or feed a slow bloom behind the paint. Skipping cleaning leaves biofilm that keeps metabolizing under your new coating, which is as fun as it sounds. Using a non-registered product that only claims it “fights mold” without an EPA number puts you in the land of marketing, not microbiology. Misidentifying your substrate is another classic. If you try to encapsulate a deeply colonized, highly porous material, you are just hiding the mess. And then there is the thick coat temptation. Slathering on a gummy blanket violates the film build spec and usually fails early. Finish it off with no post-remediation verification, and you will not know you missed until the smell or spotting returns.
Real-World Examples
Basement Rim Joist: We found minor surface growth after a dehumidifier went offline for a month. After sealing exterior air leaks and setting a permanent dehumidifier to 50 percent RH, we cleaned, dried to 12 to 14 percent MC, spot-primed with an EPA-registered antimicrobial primer on the accessible joists, then encapsulated the entire band joist with a vapor-permeable coating. Two summers later, zero spotting and rock-solid adhesion.
Attic OSB Sheathing: A bathroom fan was venting into the attic. We corrected the ducting to the exterior, cleaned with HEPA and mechanical agitation, allowed the sheathing to dry below the seasonal norm, and applied a white-tint encapsulant rated for cold attics. No finish coat needed. The encapsulant brightened the space and made future inspection easy.
Busted Supply Line in a Kitchen: Lower drywall and insulation were removed to the studs the same day. After drying, studs were cleaned and spot-primed with an antimicrobial primer. We finished with a clear encapsulant on the studs because the client wanted easy inspection in the future. New drywall went up over a dry, stable, coated frame, not a hope-and-a-prayer paint job.
FAQs
Can I just paint with a store-bought mold-resistant paint?
You can, but if you skip cleaning, drying, and substrate checks, you are paying for cosmetics. Mold-resistant paints help prevent surface spotting in borderline humidity, but they do not rescue bad prep.
Do I need both an antimicrobial primer and an encapsulant?
Sometimes. On structural framing or masonry, a light antimicrobial pass after cleaning followed by an encapsulant is common. On finished walls or ceilings where you need a topcoat, an antimicrobial primer under a compatible finish is often the move. Match the stack to the material and the label.
How do I know if a product is legit?
Look for an EPA Reg. No. for antimicrobial claims, a technical data sheet with film build and cure specs, and compatibility notes for your substrate. If the label is all buzzwords and no numbers, keep walking.
Sources
Mold Remediation Authority – Encapsulation vs Removal
Mold Remediation Authority – Antimicrobial Treatments
Mold Compass – Encapsulation vs Removal
Mold Answers – When Is Encapsulating Mold Appropriate?