It is raining in your living room and nobody roasted a marshmallow. An accidental sprinkler discharge can turn a quiet Tuesday into a slip-and-slide audition in seconds. The clock is not your friend right now. Floors cup when wood drinks too long, ceilings sag when gypsum gets heavy, and mold starts party planning in as little as 24 to 48 hours. This is your first-hour SOS plan, built from hard-earned restoration experience and the same rapid drying protocol we use on full-blown mitigation projects. If you act fast and act smart, you can stop the flow, keep your power safe, extract water, start controlled drying, and document the whole thing so your claim does not get bogged down in “coulda-shoulda” purgatory.
Why The First Hour Decides Everything
Sprinklers move a shocking amount of water. Even a single head can soak a room before you get your shoes on. Porous materials like drywall, MDF trim, cabinets, and engineered wood start absorbing immediately. The longer the soak, the deeper the moisture drives into wall cavities, subfloors, and insulation. Deep moisture is slow to release and easy to miss without tools. That is how you get lingering odor, cupped planks, and microbial growth that shows up like an uninvited sequel months later.
Our mission in the first 60 minutes is simple. Stop the water. Control electrical hazards. Get bulk water out fast. Start a rapid drying protocol that lowers humidity under 60 percent quickly. Document every step with photos and moisture readings. That blueprint lines up with industry best practices and IICRC structural drying guidance, and it is how we keep a bad hour from turning into a bad month.
0-5 Minutes: Stop And Secure
Kill the water first. If your system has a sprinkler riser with a labeled floor or zone valve, close that. If you cannot find it in 30 seconds, close the main water supply to the home. Turn the wheel clockwise or pull the ball valve handle perpendicular to the pipe. If you live in a condo or a building with a monitored system, notify building management or the monitoring company after the water is off so they are not dispatching trucks while you are wringing towels.
Next, make the area electrically safe. Water near outlets, power strips, or a wet ceiling is a no-go. Go to the breaker panel and switch off the circuits that feed the wet rooms. If water is inside the panel area or you hear crackling, keep your distance and call the utility or fire department from a safe spot. Do not touch standing water if you are unsure whether power is off.
Move people, pets, and valuables out of the splash zone. Glass tables, polished floors, and a surprise indoor rainstorm are a slip-hazard trio. Get shoes with tread on your feet and keep kids and dogs out until you have traction back.
5-15 Minutes: Contain And Protect
Now you are buying time. Use towels or old blankets as water booms to block doorways and redirect flow toward a drain, shower, or out the back door. Grab clean trash cans or buckets to catch any ongoing drips while the last of the line pressure bleeds out. If you have plastic sheeting or contractor bags, tent them under slow drips to avoid soaking more of the floor.
Lift area rugs and move them out. Leave them flat to dry later, not bunched up in a corner where they will mildew. Slide aluminum foil or plastic lids under wood furniture legs so tannins do not bleed into the floor finish. Pull electronics, artwork, paper files, and textiles off the floor. Open cabinet doors and drawers in the wet area so trapped humidity does not turn them into swollen bricks. If water is pooling above a ceiling and you see a growing belly, stand clear. Power must be off before anyone approaches a wet ceiling.
15-30 Minutes: Extract Standing Water
Bulk water is the enemy of fast recovery. A wet or dry shop vac is your MVP right now. Use slow, overlapping passes like you are mowing a lawn. Press the nozzle down firmly to pull water from joints and between planks. On carpet, use the crevice tool to trace along baseboards where water collects. If the discharge was heavy, rent or borrow a small extraction unit from a tool rental store. Every gallon you remove now is a gallon you do not have to evaporate later.
Check rooms next to and below the sprinkler discharge line. Water loves to sneak under thresholds and inside wall cavities. If you are comfortable with light trim work, carefully pop off baseboards in the wettest areas to expose the drywall edge. Label the back with painter’s tape so you can reinstall correctly. If liquid water ran into the wall, you can create a few small half-inch holes at the base between studs to let air move in and out. That trick mirrors what we do on pipe rupture jobs and it saves walls from staying wet behind the paint film. Skip cutting into any surface if your home may have lead paint or asbestos-containing materials. Homes built before the 1980s or with unknown finishes should be handled by pros with testing and proper containment.
30-60 Minutes: Rapid Drying Protocol
With standing water handled, switch to controlled drying. Air movers push moisture off wet surfaces. Dehumidifiers catch that moisture so it does not rebound into the structure. Household fans alone shuffle humid air around. You need airflow across wet materials plus water removal from the air for a real win.
Shut windows and exterior doors. Run one or more low-grain refrigerant dehumidifiers if you have them. If you only have a consumer dehumidifier, run it at full power and position it centrally with at least 12 inches of clearance on all sides. Aim for indoor relative humidity below 60 percent as fast as you can, ideally in the 45 to 50 percent range. That is the threshold where mold stops eyeing your drywall like a buffet.
Angle air movers along walls to create a racetrack pattern that peels moisture away. Do not point fans directly at a sagging ceiling or glossy veneer that could ripple. Pull toe-kicks from cabinets if the plinths are wet, then place a small fan to move air across that cavity. If you removed baseboards, aim air down low. Keep the HVAC fan on if the ducts are dry and overhead, and the system is not at risk of pulling wet debris into returns. If you suspect water in floor or ceiling ducts, leave HVAC off until inspected.
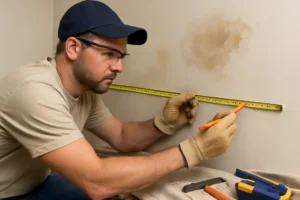
Use a pin or pinless moisture meter to map what is actually wet. Pick a known-dry spot in the same room to set your baseline. Then log readings on walls, trim, and flooring in a grid pattern. Take photos of the meter display next to the surface. Those numbers, along with humidity logs, are what adjusters and restoration techs use to verify when structure is back to target.
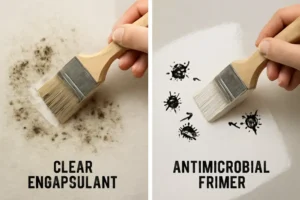
If surfaces are visibly dirty from sprinkler runoff dust, clean them and apply an EPA-registered antimicrobial only after you have removed bulk water. Do not soak materials with chemicals. The objective right now is clean, dry, and measurable.
Photos, Logs, And Insurance
Document like a claims adjuster is riding shotgun. Start with wide shots of each affected room, then close-ups of wet floors, baseboards, toe-kicks, ceiling areas, and any contents that were damaged. Take a short video that shows the water path from the sprinkler head across the floor and down hallways. Snap the shutoff you used, the panel with the tripped breakers, and the dehumidifier control panel showing current humidity. If you used a moisture meter, photograph the reading next to the wall or floor.
Build a quick sketch of the rooms and mark where water reached. Keep a log with timestamps: water shut off at 2:18 pm, extraction started at 2:30 pm, first humidity reading at 3:05 pm, baseboards removed at 3:20 pm, and so on. Save all receipts for equipment, supplies, and emergency labor. Contact your insurance carrier promptly and tell them you mitigated immediately to prevent further damage. Insurers expect prompt action to reduce loss. If you need structure-drying experts, ask for a mitigation claim number and request permission to proceed so drying does not stall while you wait for a site visit.
If you want a ready-made structure for this step, use an emergency checklist and a claim documentation checklist so you do not forget the boring-but-critical items. Many restoration teams, including us, provide printable versions so you can fill them out while you are still drying.
Delay Destroys Homes
Waiting on water is like leaving milk in the sun. Mold can start in 24 to 48 hours if porous materials stay wet. Engineered wood and solid hardwood will cup when the top dries faster than the bottom. Drywall wicks water fast, then loses strength and sags under its own weight if it stays loaded. Cabinet boxes are often particle board that swells and delaminates. The fix list gets longer and more expensive with every hour the building hangs out in high humidity. This is why we push so hard in the first hour. Aggressive early extraction and controlled drying avoids demolition in many cases and shortens the project from weeks to days.
When To Call Professionals
Bring in a restoration crew if any of these apply. The sprinkler ran long enough to soak multiple rooms or a second story. You cannot drive humidity below 60 percent in two hours. Ceilings are wet or sagging. Water reached wall cavities, cabinets, or insulation. Flooring is buckling or you have real wood planks that cupped. You live in a building with fire alarm and sprinkler monitoring that requires licensed work to restore service. You are worried about lead paint, asbestos, or specialty materials. Pros show up with truck-mount extraction, low-grain dehumidifiers, air movers sized to the cubic footage, wall cavity drying systems, meters that find hidden moisture, and an inspection plan with follow-up after 3 to 5 days to verify structure is back to target. They will also apply an antimicrobial once the area is clean and begin or assist with your claim documentation and moisture logs.
First-Hour SOS Checklist
- Cut water at the sprinkler zone or main.
- Cut power to wet rooms at the breaker.
- Protect contents and block water migration.
- Extract standing water with a shop vac.
- Start rapid drying protocol with airflow and dehumidification.
- Open cabinets, remove baseboards in wet zones, and create small low holes if needed for airflow.
- Log humidity and moisture readings with photos and timestamps.
- Call your insurer, start a claim, and keep receipts.
- Call a pro if humidity control or structural wetting is beyond DIY.
FAQs On Sprinkler Discharge
Will Insurance Cover An Accidental Sprinkler Discharge?
Most homeowners and condo policies cover sudden and accidental sprinkler leaks or discharges. Coverage and deductibles vary. Document your mitigation steps, keep all receipts, and report promptly. If you are in a condo or apartment, both your policy and the building’s master policy may be involved, so keep communication tight.
How Do I Shut Off Just The Sprinkler And Not My Whole House?
Many residential systems have a riser with a control valve for the sprinkler piping. It is often near the water heater, in a garage, or in a closet. If you do not see a labeled valve quickly, close the main to stop the flood, then trace the system when you are not ankle-deep. In multiunit buildings, maintenance or the fire riser room will have zone valves.
Is Sprinkler Water Clean Or Contaminated?
Sprinkler water usually starts as clean potable water in the piping. Once it splashes through a ceiling or across dirty surfaces, it can pick up particulate. In IICRC terminology, it typically begins as Category 1 and can deteriorate to Category 2 with time and contact. Clean the area and dry quickly to prevent further deterioration.
Do I Need To Replace Wet Drywall?
If drywall got lightly wet near the floor and you start drying within the first hour, it often can be saved. If it stayed saturated, lost strength, or shows swelling or mold, replacement is the right call. Ceilings with a sag or that stayed loaded with water should be evaluated by pros to avoid collapse.
How Long Should Drying Take?
Most sprinkler discharge jobs dry in 3 to 5 days with proper equipment and monitoring. Materials and weather matter. Dense cabinets and subfloors take longer. The finish line is not a guess. It is when your meter readings match target levels in an unaffected area and indoor humidity is stable.
Should I Open Windows To Help?
Only if it is cool and dry outside. If outdoor humidity is higher than indoor, you are feeding the problem. For most jobs, close windows and let dehumidifiers do the heavy lifting.
Real-World Setup Examples
Say a single sprinkler head in your 12 by 18 living room popped for two minutes before you found the valve. You extracted quickly but the area rug, one sofa leg, and the first 2 feet of drywall are wet. A solid starter setup is 1 medium LGR dehumidifier rated around 70 pints per day plus 3 to 4 air movers placed along the wet walls. Pull the baseboards, open the TV cabinet doors, and foil the sofa legs. Close the room to outside air and keep the dehumidifier running nonstop. Log humidity every few hours. On day two, take moisture readings of the drywall and floor. You want to see a downward trend toward the dry-room baseline. If humidity sits stubbornly above 60 percent or readings stall, scale up equipment or call a pro for an assessment.
Bigger hit example. A loft-level discharge rains through a ceiling into the kitchen and down a wall behind cabinets. You shut water within three minutes, but water tracked down stud bays and dripped from can lights. Do not power lights back on until cleared. You will want ceiling containment and evaluation for insulation moisture, cabinet toe-kick removal, positive-pressure wall cavity drying, and a larger dehumidification setup. That is a professional job because hidden cavities and wet insulation complicate the dry-down.
| Area | Typical Gear | Target Readings |
|---|---|---|
| 200-400 sq ft living room | 1 LGR dehumidifier + 3-6 air movers | RH 45-50 percent, drywall back to baseline |
| Hallway with wet baseboards | 2-3 air movers aimed low | Trim and lower wall within 2-3 points of dry area |
| Cabinet toe-kick cavity | 1 small fan or cavity drying system | Moisture in cabinet side panels trending down daily |
After The First Day
Keep airflow steady and dehumidifiers running. Empty tanks or check drain hoses so you do not stall progress. Twice a day, log indoor humidity and temperature plus meter readings at the same wall and floor points. If you peeled baseboards, leave them off until materials are at or near target. Expect 3 to 5 days for proper structural drying when equipment is sized correctly, as we teach our teams and customers on our water restoration projects. When everything is back to normal readings, reinstall trim, caulk, and touch up paint. If paint blisters or staining shows up, flag it for your adjuster and contractor. Before you wrap up, do a last moisture map and take final photos. Store your logs and receipts with your claim number. A clean paper trail keeps adjusters happy and claims moving.
Missteps That Wreck Drying
Do not delay the shutoff or the call. Those first minutes count. Do not run only household fans while the room is a sauna. Airflow without dehumidification spreads moisture around and drives it deeper. Do not skip the meter. Surfaces that feel dry can hide wet cores that turn into mold later. Do not seal wet walls with fresh paint. You trap moisture and guarantee blistering. Do not let ceilings bulge unchecked. Power off first, then have a pro relieve water safely if there is any doubt. Do not assume rugs over hardwood protected the floor. They usually trap moisture and cause perfect little islands of cupping. Most of all, do not forget the documentation. Photos, readings, and receipts are your receipts for doing the right thing fast.
If you are staring at an accidental sprinkler discharge right now, breathe, follow the playbook, and push hard for that first hour. Floors do not have to cup, ceilings do not have to sag, and mold does not have to get a vote. Stop the flow, secure the power, extract, launch the rapid drying protocol, and document like you mean it. If you need backup, call a team that lives and breathes this stuff and will be back with moisture meters in 24 hours to prove the structure is drying on schedule.