Sprinklers are great at watering lawns and terrible at babysitting your siding. If your irrigation throws a daily shower at brick, stucco, or lap siding, you are quietly feeding siding rot and hidden wall damage. Water pushed at a wall from the outside behaves a lot like water spilled inside a wall cavity: it finds gaps, wicks behind cladding, and lingers where wood and paper-faced materials are more than happy to soak it up. If your house has that one zone that mist-coats the wall like it’s auditioning for a car wash, this one’s for you.
How Overspray Wrecks Walls
Irrigation overspray is simple: a sprinkler throws water where water doesn’t belong. On contact, that spray hits siding and trim, then follows gravity and surface tension. It rides behind laps, tucks under trim, and seeps into nail holes and hairline gaps in caulk. With porous claddings like brick and stucco, water saturates the surface, migrates inward by capillary action, and then looks for the path of least resistance. If there’s missing or failed flashing, that water slips behind your weather-resistive barrier and starts wetting the sheathing and framing.
Wind turns a neat arc of spray into a side-slap that reaches windows, door casings, and the wall-to-roof transition. That last detail is notorious. Without properly formed kick-out flashing at the lower end of a roof-to-wall intersection, water runoff curls behind siding instead of shooting into the gutter. Add a sprinkler patting the same spot twice a day and you’ve got saturation on repeat. If you want a quick primer on why flashing and weep paths matter, bookmark our post on flashing failures and weep holes. It explains why even a little exterior water is a big interior headache when drainage paths are blocked.
Claddings At Risk
Different wall finishes handle water differently, but none of them love daily showers.
Brick veneer looks tough, but it is a sponge. Bricks absorb water, mortar joints develop hairline cracks, and if the weep holes along the bottom course are clogged, trapped moisture goes hunting for escape routes into the wall. Your sheathing then takes the hit. Stucco handles splash better than raw wood, but hairline cracks and poorly sealed penetrations let overspray reach the paper and lath layer. If the building paper is torn or lapped wrong, water goes straight to the sheathing. Traditional wood lap siding and trim are the most obvious victims. Repeated wetting swells the fibers, opens paint films, and feeds fungal decay. Fiber cement is more forgiving, but paint and caulk joints still fail and let water into the substrate and framing. Even vinyl siding, which sheds bulk water well, can funnel overspray behind panels where it condenses on cold sheathing if ventilation is poor.
Early Warning Signs
You rarely see siding rot early, but your house whispers clues if you pay attention. Outside, look for discoloration lines where the spray pattern hits, peeling or blistered paint at the lower courses, soft or swollen trim at door casings and skirt boards, and fuzzy green or black growth at shaded sections that get watered daily. Efflorescence on brick is a dead giveaway that water is moving through the veneer. On stucco, faint brown or rust-like shadowing below window corners suggests water migration. Inside, check for musty odors at baseboards near irrigated walls, hairline cracks that telegraph from damp framing, bubbled paint on lower drywall, or cupped hardwood near exterior walls.
| What You See | What It Often Means |
|---|---|
| Crescent-shaped stain on siding at sprinkler height | Overspray saturation line from mis-aimed head |
| Soft or crumbling trim at door bottoms | Repeated wetting, failed end-grain sealing |
| Efflorescence on brick near grade | Moisture moving through veneer, clogged weeps |
| Musty odor at baseboards inside | Wet drywall plates or sheathing behind the wall |
| Peeling paint in a halo pattern | Daily wet-dry cycles breaking paint film |
Quick Fixes You Can Do Today
Start by turning on the system and watching it work. Walk the perimeter while each zone runs. If a head is watering your wall like it’s trying to grow stucco, correct the aim right there. Most pop-up spray heads have a small screw at the top to adjust arc and radius. If mist drifts in the breeze instead of forming clear droplets, your pressure is too high. Misting looks harmless and wastes water, but it also carries moisture onto walls you thought were safe. A zone pressure regulator or regulated heads fix that by dropping pressure into the sweet spot so the sprinkler throws a clean, controlled pattern.
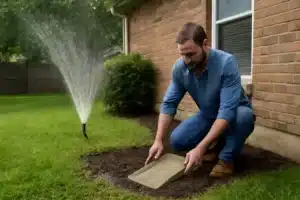
Consider swapping standard spray nozzles for rotary nozzles with matched precipitation rates. They throw slower, heavier streams that resist wind and avoid splash-back. Where grass meets walls, convert that strip to drip irrigation so water goes to roots instead of siding. If you keep sprayers near the house, run them early enough to dry in daylight but late enough to avoid wind gusts. Dawn runs plus dew means your exterior stays damp longer, and that longer wet time is what fungi use to set up shop. If you need a simple test, hold a piece of cardboard or plywood near the wall while a zone runs. If it gets pelted or if water bounces off hardscape onto the wall, you still have a problem.
Do not forget the easy wins: fix tilted heads that have sunk below grade, trim back plants deflecting spray onto siding, and shield window sills that take a beating from nearby heads. While you tune the irrigation, check your water pressure inside too. If your home runs at a fire-hose 80 psi, you are forcing more water through sprinkler nozzles than they were designed to handle. A whole-home pressure reducing valve set around 55 to 60 psi will help the plumbing and the irrigation both.
Strong Long-Term Defenses
Even with well-behaved sprinklers, your building envelope has to be ready for surprise moisture. That starts with correct flashing. Kick-out flashing at roof-to-wall transitions is a must so roof runoff shoots into the gutter instead of curling behind cladding. Above windows and doors, install properly lapped head flashing or drip caps. At sills, use sloped sills or sill pans so incidental water exits outward, not inward. Every piece must overlap the one below, shingle-style, so gravity works for you.
Behind the siding, you want a continuous weather-resistive barrier that is intact and lapped correctly. If your home is older or was patched without care, this is where we often find the smoking gun. Modern rainscreen systems that add an air gap between cladding and sheathing are fantastic at letting incidental moisture drain and dry. If you are re-siding, add that gap. On brick veneer, make sure weep holes at the bottom course are clear so any absorbed water has an escape. We explain why clogged weeps ruin the whole drainage plan in our post on flashing and weep holes.
Sealants and caulk are not waterproofing in a tube, but they help when used correctly. Focus on small joints the rain screen does not address, like vertical trim seams and penetrations. Pick high-quality, paintable sealants rated for your cladding and climate, prep the surfaces, and follow joint design rules so they flex without tearing. Keep grade-to-siding clearance. Wood and fiber cement need 6 to 8 inches of clearance above soil and at least 2 inches above hardscape. If mulch climbs the wall, you are holding moisture against the cladding and hiding the bottom edge where decay starts. Regrade landscape beds so water slopes away from the foundation at 5 percent or better for the first 5 to 10 feet.
When Walls Are Already Wet
If you suspect moisture intrusion, do not patch the paint and hope for the best. Find the wet, stop the source, then dry and rebuild correctly. We start with moisture mapping using pin and pinless meters, thermal imaging, and sometimes small inspection holes to check sheathing and stud faces. When readings show elevated moisture, we open the assembly with controlled removal. That usually means pulling lower courses of siding or brick veneer sections, cutting out affected drywall inside, and exposing the sheathing. The goal is to remove unsalvageable materials, clean what can be cleaned, and set up airflow and dehumidification to bring moisture levels back to normal.
Mold does not wait for permission. If conditions have been wet for 48 hours or more, we assume microbial growth has started and set containment protocols. That includes negative air and HEPA air filtration, source removal of moldy materials, and cleaning remaining surfaces with HEPA vacuuming and detergent-based wipe downs. We do not fog mystery chemicals and call it good. Once the area is dry and clean, we rebuild with the right layers: fresh sheathing if needed, taped seams as specified, a continuous weather-resistive barrier, flashing sequenced in the right order, and cladding reinstalled with correct fasteners and clearances.
Interior finishes get replaced last. Baseboards, drywall, and flooring go back only after wood framing moisture content reads within target range for your climate. If you have hardwood that cupped from wet exterior walls, we evaluate whether sanding is viable or if replacement is smarter. Carpet and pad rarely survive contamination near exterior walls that have been wet for days. The upside to doing this right is that you’re not just fixing the symptom. You are correcting the hidden pathways that let irrigation overspray become a chronic leak.
Costs, Timelines, and Insurance
The price tag depends on how far the moisture traveled. If you caught the problem early and exterior-only repairs are possible, you might be looking at a few sprinkler parts, some trim replacement, caulking, and paint. If overspray pushed water behind cladding long enough to rot sheathing, expect selective demolition, structural repair, and envelope reconstruction. That can take several days to a couple of weeks, especially if microbial remediation is needed and drying time runs long. We cover general cost drivers and timelines in our post on water damage repair costs.
Insurance coverage varies. Many policies treat slow leaks and ongoing seepage as maintenance issues, not covered events. If a broken head suddenly flooded a wall, that might be different. Document conditions thoroughly with photos, moisture readings, and a clear timeline. We provide documentation packages that help adjusters see the difference between a one-time event and a long-term condition. Either way, fixing the cause and restoring the envelope correctly is non-negotiable, because rot does not negotiate.
Maintenance That Actually Works
Sprinkler systems are set-and-forget until they quietly eat your siding. Make a calendar note for seasonal checks. Spring is perfect for a full run-through of each zone, swapping worn nozzles, and making sure regulated heads are still regulating. After summer windstorms, confirm spray arcs have not shifted. Clean gutters and downspouts so water leaves the roof fast and does not cascade down your walls during storms or irrigation cycles. Keep shrubs pruned so they do not bend spray toward the house. Every few months, scan lower courses of siding, door trim bottoms, and window corners for swelling or paint defects. If you see brick weep holes packed with mortar crumbs, mulch, or spider condos, clear them so trapped moisture can exit. Our article on preventing water damage lists more simple habits that pay off.
Finally, pay attention to the ground. Splash-back is real. If sprinklers hit hardscape first, the rebound can pelt your wall even when the head is technically aimed away from the house. Reposition heads, add small deflectors, or break up the splash with gravel borders next to walls instead of bare concrete or compacted soil. If the yard slopes toward the house, you’re inviting water to hang out at the base of your wall. Regrade or add drains so the water you paid for goes to your plants, not your sheathing.
FAQ: Irrigation Overspray And Siding Rot
How Do I Know If My Sprinklers Are Damaging My Siding?
Run each zone and look for any spray touching the wall, mist drifting in the breeze, or water bouncing off walkways onto the siding. After a cycle, check for wet bands on the cladding, damp trim at door bottoms, and moisture along the foundation. Inside, sniff for musty odors near exterior baseboards. If you see a repeating stain pattern at the same height as your sprinkler arc, that’s your smoking sprinkler.
What Should I Adjust First?
Start with aim and pressure. Re-arc mis-aimed heads so they stop short of the wall, then tune pressure with a zone regulator or regulated heads so you get defined droplets, not mist. Swap to rotary nozzles in windy areas and convert narrow strips next to the house to drip. Set the controller to run when wind is typically low and when the siding can dry in daylight.
Will Caulking My Siding Solve Overspray Problems?
No. Caulk is a helper, not a cure. If water is constantly thrown at the wall, it will find a way in. Correct irrigation first, then make sure flashing, weather barriers, and grade-to-siding clearance are correct. Use caulk to seal small, appropriate joints after the big issues are handled.
Can Brick Or Stucco Really Rot My Wall?
Brick and stucco do not rot, but the wood and paper-backed materials behind them do. Both claddings absorb water. Without clear weep paths and correct flashing, that moisture migrates inward and wets your sheathing and framing, which absolutely can rot.
What If I Already Have Mold Behind The Wall?
Stop the water, then bring in pros who follow industry standards for containment, removal, and drying. We use moisture meters, thermal imaging, and controlled demolition to expose and dry the assembly, run HEPA filtration, and rebuild the envelope correctly. Our team outlines a plan, documents findings, and gets the structure dry before finishes go back.
Do I Need Kick-Out Flashing If My Sprinklers Are Fixed?
Yes. Kick-out flashing is not optional. It catches roof runoff at the roof-to-wall transition and shoots it into the gutter. Without it, water curls behind cladding during rains. Fixing irrigation cuts one source, but storms still happen, so the envelope needs that defense.
How Far Above The Ground Should My Siding Be?
Keep wood and fiber cement 6 to 8 inches above soil and at least 2 inches above concrete or pavers. That gap keeps splash and wicking from soaking the bottom edge, which is where decay usually starts.
Call In The Pros When You See Trouble
If your sprinklers have been hosing the house for months or years, you likely have more than surface stains. We can check with the right tools, open only what needs opening, dry what can be saved, and rebuild the envelope so it actually drains and dries. We also help fine-tune irrigation so you stop feeding the problem you just fixed. Tap us for a moisture inspection, and we will tell you exactly what is wet, what is rotted, and what it takes to make it right.