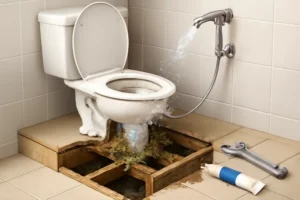
Your drywall did not suddenly decide to cosplay as a coffee filter. If you see brown streaks under a window, mushy baseboards, or trim swelling like a sponge, you’re probably dealing with a window flashing failure, blocked weep holes, or both. The leak path is sneaky, the damage is real, and the fix is more than “slap some caulk and hope.” Here’s a clear, no-nonsense guide to find the culprit fast, stop further damage, and fix it so it stays fixed.
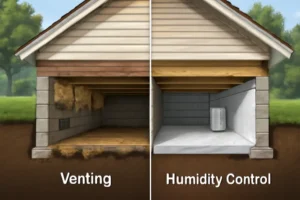
Flashing And Weep Holes 101
Flashing is the quiet bodyguard your windows deserve. It’s thin metal or membrane that gets layered around the window opening to kick water out and away before it ever reaches your framing. There are three big players: head flashing at the top, jamb flashing on the sides, and sill pans or sill flashing at the bottom. When installers skip, reverse-lap, or short-cut these layers, water follows gravity into your wall cavity. That is how you get stained drywall and rotten framing without a single dramatic leak moment.
Weep holes are the little drainage ports along the bottom of many window frames. They let wind-driven rain and condensation escape from the interior frame track to the exterior. If those slots get clogged with paint, dirt, caulk, or a spider’s Airbnb, water backs up and spills where it should not. It will soak the interior sill, then the drywall below, then the framing, and that is when mold starts auditioning for a long run inside your wall. For a deeper look at how weep systems move water through frames, see Warren Forensics.
Head-Flashing Mistakes
Head flashing sits above the window to shed water over the face of the cladding. When it’s done right, water hits that drip edge and goes out and down. When it’s done wrong, water gets a VIP pass behind your siding and right into your wall assembly. The usual mistakes look like this:
Installers rely on caulk as the only defense. Caulk is a seal, not a roof. It moves, ages, cracks, and eventually quits. Flashing needs a layered, shingle-style path out, not a bead of wishful thinking.
Overlaps face the wrong way. If your weather-resistive barrier and flashing tape are reversed, water runs behind the metal or membrane instead of over it. Water flows down, not uphill. The layers should too.
Wrong materials or wrong climate. In hot sun or salty air, some adhesives and sealants degrade faster. Self-adhered flashing tape needs the right substrate, prep, and pressure to bond. If it puckers or fishmouths, it leaks. For common flashing sins and best practices, the trade pros at Benjamin Obdyke outline several failure modes worth avoiding.
Missing end dams or short drip edges. If head flashing stops short or lacks kick-outs at the ends, water can curl back behind trim or siding.
Blocked Weep Holes
Weep holes are supposed to look a little ugly. They’re not there to be pretty. They’re there to drain. When you paint over them, drown them in caulk, or bury them under coil wrap or mortar, water that enters the frame track has nowhere to go. It fills the track, overflows inside, and stains drywall below the window. Keep an eye out for insect nests, dirt, or debris stuffed into the slots. Even factory weep covers can clog over time.
Clogged weeps are the single easiest DIY fix that actually stops leaks. Carefully clean them and confirm they drain. We cover that test below, and you can also see practical cleaning tips in this quick guide from HGTV. If your weep holes are missing, blocked by exterior finishes, or the frame track is not tied to an exterior weep path, you’ll need a window specialist to modify the frame or cladding.
Diagnose The Leak
Start inside. Look for crescent-shaped stains below the window corners, swollen trim joints, soft baseboards directly under the window, or a musty odor that spikes after rain. Check the interior sill and frame track for standing water after a storm. If water is pooling inside the track, you have a drainage problem in the window itself or blocked weep holes.
Now go outside. Look for a drip cap above the window. You should see a metal or PVC head flashing that projects slightly to shed water. If it’s missing, extremely short, tucked behind trim without a proper drip edge, or sealed tight on the bottom edge, water may be getting behind the cladding. Scan the caulk lines. If you see a heavy bead filling every joint around the window, especially along the bottom, someone may have sealed off the intended drainage paths.
Test the weep holes. Pour a small cup of water into the interior frame track at the bottom of the window. Watch the exterior face. You should see water exiting within a few seconds through the weep slots. If nothing comes out, they are blocked or there is no internal connection to the exterior. Try a gentle poke with a plastic coffee stirrer or a trimmed zip tie. No metal skewers and no pressure washers. If you free a clog, repeat the pour test to confirm steady flow. For a walkthrough on how weeps are supposed to move water, see Warren Forensics.
Look under adjacent roof lines. If a roof dumps water against the wall near the window, missing kick-out flashing can push a lot of water behind siding. That shows up as leaks at window heads and corners. Kick-outs at roof-to-wall transitions are not optional in high water zones.
| Symptom | Likely Cause | First Move |
|---|---|---|
| Water in window track after rain | Blocked weep holes | Clean weeps and retest with a cup of water |
| Stain under window head or top corners | Head-flashing failure | Inspect head flashing, drip edge, and overlaps |
| Wet drywall below sill only | Trapped track water or sealed bottom joints | Unblock weeps and unseal bottom-only caulk traps |
| Repeated leaks during wind-driven storms | Bad flashing sequencing or missing kick-out | Open cladding as needed and re-flash correctly |
Avoid The Sealant Trap
Caulk is fantastic when it compliments drainage. It is a disaster when it blocks it. The bottom of the window needs a way to drain out. If you caulk the bottom edge solid, you’ve created a bathtub. That trapped water then finds the one place you forgot about: inside your wall. Here’s the simple rule set we follow in the field. Seal the sides and head to keep bulk water out. Keep the bottom free to drain unless the window design routes water elsewhere. Use backer rod and compatible sealant so joints move without tearing. Never bridge over weep slots with caulk, tape, coil wrap, or trim. If a painter plugged the weeps with paint, that is a quick fix. If a remodel buried them behind trim or masonry, that is a reconstruction job.
If you are picking a sealant, match it to the materials you are joining and the climate. UV exposure, heat, and substrate movement can shred the wrong product in one season. The fix is to choose the right chemistry for vinyl, wood, fiber cement, or metal and apply it in the right joint profile. Still not sure? Test a small area and check after a week of sun.
Fast Containment
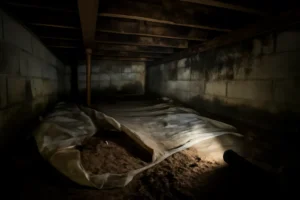
Stop the wetting before you fix the building. Put a towel or plastic sheet on the interior sill and floor to catch any drips. If water is actively running, tape a temporary water path with plastic flashing tape to guide water outside while you work. If drywall is saturated and sagging, carefully remove a small section at the bottom to release trapped water and airflow. Run a dehumidifier near the affected wall. Avoid blasting fans directly into the cavity unless you have containment and filtration. If you see mold larger than a bath towel, or if kids, elderly family, or anyone with respiratory issues live in the home, call a restoration pro for safe remediation. Turn off power to outlets in the wet wall if water has reached them, then bring in an electrician if you have any doubt.
Fix It Right
Cleaning weep holes and undoing caulk traps solves a surprising number of leaks. When that is not enough, fix the flashing properly. Correct flashing is a sequence, not a product. The layers must lap in shingle fashion so water always exits the face of the cladding, not behind it.
At the head, install a proper drip cap or metal head flashing that extends past both jambs with small end dams so water cannot curl back. The top leg should tuck under the weather-resistive barrier above, and the outer leg should project to shed water. If the siding profile prevents projection, use a compatible trim detail that still creates a drip edge. If you have stucco, fiber cement, or brick veneer, expect to remove a bit of cladding to integrate the flashing correctly.
At the sill, install a pan or preformed sill flashing that collects and kicks out any water that slips past the window. Tie that pan into the exterior drainage plane so it drains to daylight, not into the wall. Never rely on a flat bead of caulk under the window as the only defense. It will fail. Modern pan flashings are cheap insurance and often retrofit friendly once the trim is off.
At the jambs, use flexible flashing or sheet metal with proper corner patches that overlap the sill pan and tuck under the head flashing. No reverse laps. No gaps at the corners. Press self-adhered membranes firmly so they bond. Watch for fishmouths at the corners and re-roll them. For installers and curious homeowners, these best practices align with many trade guidelines and the kind of errors called out by Benjamin Obdyke.
Once the flashing is corrected, replace sealants with compatible, flexible products. Do not seal the bottom weep paths. Reinstall trim and cladding with a small drainage gap if the system was originally designed that way. When everything dries, perform a controlled hose test: start low, work your way up, and never blast directly at the head or weep holes. You are testing gentle rain, not a pressure washer. If the interior stays dry, you nailed it.
DIY Or Call A Pro?
You can clean weep holes, undo bad caulk, and test drainage with a cup of water. You can also replace small sections of soggy drywall, run dehumidifiers, and clean up a small, surface mold spot safely if it is truly small and on non-porous surfaces. Once you are facing framing rot, repeated stains after every storm, musty odor that lingers, or leaks that return after you cleared the weeps, it is time to bring in help. Hidden flashing failure often lives behind siding and needs partial disassembly. If you see discoloration creeping along studs or the sill plate feels soft, call a water damage restoration pro and a window installer. If scaffolding, stucco, brick, or a second story is involved, plan for a professional fix. Your house is not the place to practice high-stakes surgery.
FAQ
Where Are The Weep Holes On My Window?
Look for small slots or round holes along the bottom exterior of the window frame or just above the exterior sill. Vinyl and aluminum frames often have rectangular weeps with little covers or flaps. On some casements, you may see tiny openings at the bottom corners. If you cannot find any, they may be painted over, buried behind trim, or the window design drains differently. Shine a flashlight along the bottom exterior to spot them.
How Do I Unclog Weep Holes Without Damaging Anything?
Use a plastic coffee stirrer, a trimmed zip tie, or a soft pipe cleaner. Gently insert and wiggle to free debris, then pour a small cup of water into the interior frame track. You should see water exit the weeps right away. You can also use compressed air in short bursts. Avoid metal picks that can scratch coatings or enlarge the slot. Do not use a pressure washer. For simple maintenance tips, this quick guide from HGTV is handy.
Should I Caulk The Bottom Of The Window To Keep Water Out?
No. The bottom is usually the drain path. Caulking across the bottom edge often seals the weep system and traps water in the frame. Seal the sides and top joints to keep bulk water out, and keep the drainage path open along the bottom. If your specific window design routes water differently, follow the manufacturer’s details. When in doubt, keep the weeps open.
Why Do I Get Leaks Only During Wind-Driven Rain?
Wind pushes water behind weak joints and up against the head of the window. If head flashing is missing or reversed, that wind-driven water sneaks behind the cladding and into your wall. It can also overwhelm partially blocked weep holes. Check head flashing first, then confirm the weeps are open.
Can I Hose-Test My Window To Find The Leak?
Yes, but do it carefully. Start low and gentle at the sill, then move to the sides, then the head, spending a few minutes at each area while a helper watches inside. Do not blast directly into the head joint or weep holes. If you see water after spraying the head area, suspect a flashing issue. If water shows up after wetting the sill track, suspect blocked weeps or a sealed bottom edge.
How Bad Can Hidden Window Leaks Get Behind The Wall?
Worse than you think. Persistent leaks rot sills, studs, and sheathing. They feed mold inside insulation and behind drywall where you cannot see it. Left unchecked, repairs can escalate from a few hundred dollars of exterior work to partial wall reconstruction. Catching and fixing a window flashing failure or blocked weep holes early saves the assembly and the budget.
What If I Have Brick Or Stucco Around The Window?
Those claddings can disguise flashing gaps and complicate repairs. We often need to remove a course or two of brick, or cut back stucco, to install or integrate proper head flashing and tie it into the weather-resistive barrier. That is not an ideal DIY project. The right fix restores the drainage plane behind the cladding, not just the face seal.
Need Help?
If your drywall is already stained or the framing feels soft, you have a water problem, not just a window problem. We track the leak path, open what needs opening, dry what needs drying, and put the assembly back together the right way. From blocked weep holes to full head-flashing rebuilds, we’ve seen it, fixed it, and tested it. Reach out and we’ll stop the leak, stop the rot, and keep water where it belongs.
Further reading: What happens if you block weep holes from Window Hardware Direct, weep hole function from Warren Forensics, and common flashing mistakes from Benjamin Obdyke.