If your ductless mini-split is the quiet roommate that keeps you cool, it can also be the messy one secretly growing fuzz on the blower wheel and coils. Wall and ceiling cassettes are mold magnets because they condense water, trap dust, then sit in the dark where spores love to party. If the first blast of air smells like a damp gym bag, your unit is overdue for attention. Here’s how to spot the problem early, what you can safely clean yourself, when to call a pro, and how to keep mold from moving back in through smart filtration, better drain care, and steady humidity control.
The Ugly Truth About Mini-Split Mold
Mold in a mini-split is not a character flaw. It is physics plus neglect. The evaporator coil gets cold, moisture from the air condenses on it, and any dust that slips past the filter sticks to that moisture. Now you have a wet, slightly dirty surface with low light and stable temps. Mold calls that paradise. The blower wheel then blasts spores through the room and spreads buildup around the cassette body, louvers, and drain pan. Ceiling cassettes crank this up a notch because they sit over your head, so a dirty unit can drift spores across the room and drip onto drywall if the drain pan or pump misbehaves.
Beyond the ick factor, a moldy blower wheel robs airflow, a slime-coated coil loses heat transfer, and a clogged drain pan can overflow. Translation, poor comfort, higher bills, and a stain on your ceiling that will haunt you in every Zoom call.
Signs Your Cassette Is Growing Gunk
Trust your nose. A musty or mildewy smell when the unit kicks on, especially after it has been idle, is the classic red flag. You might also see gray or black specks on the vanes and surrounding plastic, fuzzy patches near the coil, or streaks around the drain pan. On ceiling cassettes, look for stains or dampness on the ceiling tile or drywall near the unit and listen for gurgling from the condensate pump. If allergies flare when the system runs, or you cough more in that room, consider that a signal. Performance clues count too, like weak airflow, whistling from a choked blower, coil icing, or the unit running longer than usual to keep up.
Safe DIY Cleaning That Works
You can handle basic ductless mini-split cleaning without turning your living room into a workshop. Stick to accessible parts, gentle cleaners, and smart prep. If you are working on a ceiling cassette, accept that gravity is not your friend and cover everything under the unit before you start.
Prep, Power, And PPE
Shut the system off at the breaker. You want fans still and live parts dead. Lay down drop cloths or plastic under the unit and set a bucket or shallow pan nearby. Wear safety glasses, gloves, and a quality mask or respirator. You are about to disturb dust, biofilm, and cleaners you do not want in your eyes or lungs.
Tools You Will Actually Use
Keep it simple. A soft brush, microfiber towels, a small spray bottle or pump sprayer, a gentle non-acid coil cleaner rated for evaporator coils, a little dish soap, and white vinegar for the drain line. A wet or dry vac with a small nozzle is helpful. For wall cassettes, a mini-split cleaning bib or catch-bag kit is nice to have. For ceiling cassettes, plan on a larger catch bag or a carefully taped plastic skirt to steer rinse water into a bucket.
Filters And Front Panels
Open the front grille and remove the screens or filters. Wash them in warm, soapy water. Rinse until clear and let them dry fully before reinstalling. Wipe the inside of the panel, the vanes, and any plastic you can touch with a microfiber towel dampened with mild detergent. This removes the dust that feeds mold and keeps it from being smeared deeper into the unit later.
Coils And Blower Without Breaking Anything
Gently mist the visible face of the evaporator coil with a coil cleaner labeled for indoor use. Non-acid, non-caustic is your friend. Let it dwell per the label, then wipe what you can reach or rinse lightly. Do not blast water into the unit like you are washing a deck. The goal is to loosen grime without flooding electronics. If you cannot safely rinse, use a no-rinse cleaner designed for evaporator coils and follow the label exactly.
The blower wheel is the usual crime scene. If your model exposes the wheel once the lower panel is off, you can carefully brush built-up fuzz from the blades and then spray them with coil cleaner while your catch bag funnels runoff into a bucket. Spinning the wheel by hand helps reach all sides. Avoid prying on the fins or dousing motors. If removal is straightforward on your unit and you are mechanically comfortable, you can pull the wheel to wash it outside, but many cassettes require disassembly that is easy to mess up. When in doubt, stop at surface cleaning and leave a deep clean to a pro.
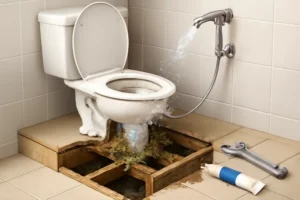
Condensate Pan And Drain That Do Not Flood
Inspect the drain pan. If you see slime or standing water, vacuum out what you can, then wipe the pan with a mild cleaner. Find the condensate drain line and disconnect the nearest access point. Flush with white vinegar until you get steady flow outside or into the pump container. If you have a condensate pump on a ceiling cassette, check the float switch and clean any gunk from the reservoir. Stagnant water is mold’s favorite appetizer. We cover drain line basics in more detail here: AC drain line maintenance.
Dry Out And Restart Without Surprises
Reassemble the panels and reinstall the dry filters. Power up and run the fan only for 15 to 30 minutes to dry the coil and wheel. Some models have a coil-dry or self-clean mode that does this automatically. Watch for drips, listen for odd noises, and then resume normal cooling or heating.
When To Call a Professional
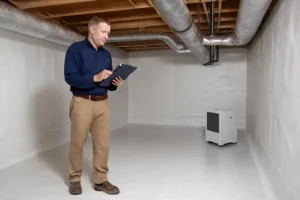
DIY cleaning is fine for light buildup and routine ceiling cassette maintenance. Pull the ripcord if you find heavy growth inside the cassette, stubborn musty odor that returns after cleaning, or any sign of water damage in the ceiling or wall. If you are looking at mold growth across a large area, roughly more than 10 square feet or across multiple cassettes, bring in a pro. Health symptoms that worsen while the unit runs are another reason to stop and get help. For a safety refresher on mold scope and exposure, we outline household thresholds here: Remove mold under wallpaper safely.
What do pros do differently for ductless mini-split cleaning? We set containment to protect your space, bag the unit with professional wash rigs, and use specialized non-acid cleaners at correct dilution. We remove and clean the blower wheel when needed, treat coil fins without bending them, clear the drain and pump, and dry the cabinet fully. If the cassette leaked, we inspect the surrounding building materials for moisture and hidden mold, then handle remediation and drying before your ceiling becomes a petri ceiling. Expect a deeper, longer-lasting result and fewer surprises the next time the unit cycles on.
Stop Regrowth For Good
Cleaning once is nice. Keeping mold from coming back is the real win. Mini-splits do not have big return ducts or massive filters, so prevention is about reducing moisture, denying food, and keeping the water path clear.
Filtration That Helps, Not Hurts
Use clean OEM filters, and clean them every 2 to 4 weeks during heavy use. Many mini-split brands offer add-on media like deodorizing or enzyme screens. Avoid dense aftermarket filters that choke airflow. High static pressure is the enemy of a clean coil and a happy compressor. If you want extra particle control, add a room HEPA purifier near the space instead of trying to hot-rod your cassette filter. That keeps dust and dander down without strangling the unit.
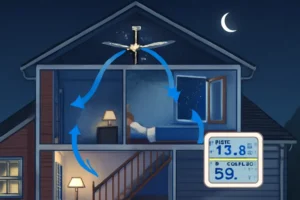
Humidity In The Sweet Spot
Keep indoor relative humidity between 30 and 50 percent, and do not let it ride above 60 percent for long. Use a small hygrometer in the room rather than guessing. Your mini-split’s DRY mode is useful during shoulder seasons, and a stand-alone dehumidifier can support problem areas. Kitchens and basements usually need the most love. Good humidity control is the single best mold prevention move for any cassette.
Operation Habits That Matter
Use Auto fan speed and do not run the indoor fan 24 or 7 in humid weather. A constantly spinning fan can re-wet the coil and pan. If your brand offers a coil-dry or self-clean feature, enable it so the unit runs the fan at the right time to evaporate leftover moisture. Avoid shutting the unit off for days during muggy weather. Instead, set it to a higher temperature or use DRY mode so the coil does not sit wet and idle.
Drain And Pan Maintenance
Flush the drain line with white vinegar monthly during peak season. If your ceiling cassette uses a condensate pump, test the float switch quarterly. Consider a non-corrosive pan tablet designed for evaporator pans to slow slime formation. Check the line outside where it terminates and clear any algae or debris. Better yet, mark a reminder on your calendar for drain checks and stay ahead of clogs before they soak your drywall.
Clean The Space Around The Unit
Dust is mold food. Vacuum with a HEPA-rated vacuum, reduce clutter below wall cassettes, and keep kitchens degreased. In kitchens, a thin film of grease on the coil and blower is like Velcro for dust and spores. If cooking aerosols reach a cassette, book cleanings more often and use a coil-safe degreaser during professional service.
Schedule A Real Deep Clean
An annual professional cleaning keeps blower wheels honest and coils shiny. If you live in a humid region, have pets, or run the unit year-round, plan on every 6 to 9 months. A clean system runs quieter, moves more air, and keeps mold from gaining a foothold inside the cabinet where you cannot see it.
Ceiling Cassette Maintenance Tips
Ceiling cassettes look sleek, but they hide a lot under the grille. First, get safe ladder access and protect the floor. Remove the intake panel and washable screens. Many four-way cassettes have corner screws for the panel and simple clips for the vanes. Inspect the drain pan around the perimeter and the central coil block for slime. If the cassette uses a built-in pump, locate the reservoir and float. Clean the reservoir with mild detergent and rinse. A sticky float or algae in the pump is the fastest route to a stained ceiling.
When cleaning the coil, be methodical because overspray falls. Tape a plastic skirt around the cassette edge and drape it into a bucket or tray so rinse water has a friendly exit. Mist cleaner upward at a shallow angle so it wets the fins without blowing through the coil into the plenum. Wipe each louver and the underside of the panel, then cycle the fan to dry the cavity before you reinstall the panel. If you see insulation inside the plenum that is water stained or sagging, stop and call a pro. Wet insulation is a mold invitation and usually means a leak or chronic drain issue that needs correction, not just a wipe down.
Mini-Split Mold Myths
Bleach fixes everything. Not here. Sodium hypochlorite and aluminum coils are a terrible couple. It can corrode fins and irritate lungs. Use cleaners made for evaporators and never mix chemicals. Running the fan all day keeps things dry. In humid climates that keeps the coil wet for longer, which is backwards. UV inside the cassette cures mold forever. Not quite. Many stick-on UV gadgets can damage plastics and wiring if they are not designed for your model. Use only manufacturer-approved kits. If you find mold, the unit is toast. No. Mold is a maintenance problem and usually very fixable unless the cabinet or insulation is saturated and falling apart.
FAQ
Can I Use Bleach On My Mini-Split?
No. Bleach can corrode aluminum fins and create fumes indoors. Use an evaporator-safe, non-acid cleaner made for HVAC coils and follow the label. For the drain pan and line, use white vinegar or a pan treatment rated for HVAC use.
What Humidity Should I Keep Indoors?
Target 30 to 50 percent relative humidity. Short spikes happen, but try not to let RH stay above 60 percent. Use the unit’s DRY mode and add a dehumidifier in problem rooms if needed. A small digital hygrometer costs little and tells the truth.
How Often Should I Schedule Ductless Mini-Split Cleaning?
Wash filters every 2 to 4 weeks in heavy season. Plan a professional deep clean once a year, or every 6 to 9 months if you live in a humid climate, have pets, cook a lot, or notice faster buildup. Ceiling cassettes that serve kitchens or high traffic spaces usually need more frequent service.
Will Cleaning Improve Efficiency?
Yes. A clean blower wheel moves more air, and a clean coil transfers heat better. That means shorter run times and less strain on the refrigerant circuit. Many homeowners notice better airflow and faster cooling right after a proper cleaning.
Is Ceiling Cassette Cleaning Different From Wall Units?
Yes. Ceiling cassettes sit above you, often include a condensate pump, and have multi-direction vanes and a perimeter drain pan. Access is trickier, overspray wants to fall into your room, and the pump needs attention. Plan better containment and be ready to clean or service the pump.
What If I See Water Dripping Or A Ceiling Stain?
Shut the unit off and check the drain pan and line for clogs. If there is a pump, it may have failed or the float may be stuck. Do not keep running the system. Dry the area and call a pro to clear the blockage, service the pump, and check for hidden moisture in the ceiling before mold sets up camp.
Are Coil Coatings Or Sanitizers Worth It?
Sometimes. After cleaning, some pros apply coil protectants or EPA-registered HVAC sanitizers. These can slow biofilm regrowth when used correctly. The key is proper cleaning first and using products compatible with your unit’s metals and plastics. Ask what is being applied and why.
Can I Remove The Blower Wheel Myself?
Only if the design allows easy access and you are comfortable with small mechanical work. Many wheels are trapped behind panels and the coil and have a set screw on the motor shaft. Bending blades, losing balance, or nicking the coil can get expensive. If it is not obvious, skip it and bring in a technician.
Pro Help When You Need It
If your cassette smells like a swamp, keeps dripping, or mocks your cleaning by getting moldy again, we can help. Our team handles deep ductless mini-split cleaning, drain and pump service, and building-side moisture checks. If there is already water damage, we dry and remediate before the stain turns into a science project. Need a refresher on preventing moisture problems tied to HVAC gear? Start with our quick guide to AC drain line maintenance, then book a professional service visit so your unit runs clean and stays that way. For larger mold concerns in the room itself, review the safe cleaning scope here: Remove mold under wallpaper safely. If you are ready to stop the musty air and prevent a comeback, reach out and we will make that cassette boringly clean again.