If your house smells like a campfire that refuses to break up with you, the culprit is probably sitting in your ceiling and walls. Smoke and soot don’t just coat the kitchen where the pan flared up. They hitchhike into your HVAC system, lurk in the ductwork, cuddle up to your coil, and then recirculate every time the blower kicks on. That stink is not just rude. Fine particles and acidic residues can irritate lungs, corrode metal, and trash electronics. This playbook breaks down how to evaluate post-fire ductwork decontamination, when cleaning and sealing are enough, when parts must be replaced, how to block re-contamination, and which tests confirm it is actually safe to run your system again.
Why Ductwork Decontamination Matters
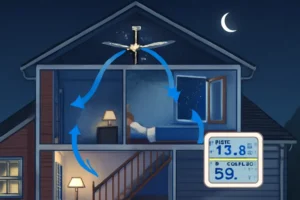
Smoke behaves like the world’s most determined houseguest. It moves fast with the pressure differences your HVAC creates, then settles in your return and supply runs, plenums, blower housing, coil fins, and registers. That residue includes tiny particles like PM2.5 along with VOCs and other combustion by-products that can keep off-gassing long after the flames are out. Beyond the cough-and-sneeze factor, soot is mildly acidic and can corrode copper windings, aluminum fins, and control boards. In short, if you ignore your ducts after a fire, your HVAC will keep re-broadcasting the problem and quietly wearing itself out.
All Nation Restoration has covered how smoke infiltrates ventilation and keeps circulating harmful particles if not addressed, along with hidden post-fire hazards like corrosion risks and residue migration. You can read more about those hazards here: The 9 Hidden Hazards After a Fire. The US EPA also flags smoke damage as a legitimate reason to clean ducts after a fire event: EPA guidance on duct cleaning.
Whether you clean, seal, replace, or combine those options depends on how hot it got, what burned, which materials your ducts are made from, and how accessible the system is. Think of it like triage for lungs made of sheet metal.
Clean, Seal, or Replace?
Here is a field-tested way to decide what your HVAC needs after smoke and soot contamination. When in doubt, get a licensed restoration contractor or NADCA-certified duct cleaner to inspect before you power anything up.
| Action | Works When | Red Flags That Mean Replace |
|---|---|---|
| Clean | Residue looks light to moderate, removable with agitation and HEPA capture. No burning, melting, or warping. Air handler components are intact and serviceable. Sheet metal ducts or smooth interiors that tolerate brushing. | Any heat deformation, melted liners, charred insulation, collapsed duct board, or heavy greasy soot from synthetic burns that will not release with proper methods. |
| Seal | Minor leakage or dust lines at seams and boots. Joints and connections are sound but not airtight. Sealing is used after cleaning to stop re-entrainment and prevent ambient smoke from infiltrating. | Gaps due to heat damage, crushed runs, or missing sections. If sealing would just hide damaged materials, replacement is safer. |
| Replace | Flexible duct that is soiled inside the liner, inner core is scorched, or insulation is saturated. Duct board with odor embedded in the core. Lined duct with compromised liner. Any metal duct that shows corrosion pitting or lost integrity. | Not applicable. If the material or structure is compromised, cleaning is not a fix. |
Hybrids are common. You might replace a few supply branches near the fire room, clean the main trunks, reseal transitions, and change the blower motor if it was chewing on soot for hours. You might strip and replace internal insulation inside the air handler while salvaging the cabinet and coil if they test clean and are mechanically sound.
What The Process Looks Like
Initial Assessment
Start with a fire timeline. How long did it burn, and what burned? Plastics and synthetics leave greasy, acidic residues that bond stubbornly. If the system was running during the fire, assume distribution throughout returns and supplies. Then do a top-to-bottom inspection. Look at register faces and backs for soot track marks. Pull a few registers and inspect the first couple feet of duct for coating thickness. Check the air handler cabinet, blower wheel, and coil. Inspect duct insulation, liners, and duct board edges for charring or odor. If the duct surface is sticky, smeary, or smells like a burnt electrical outlet, you are dealing with more aggressive cleanup or replacement.
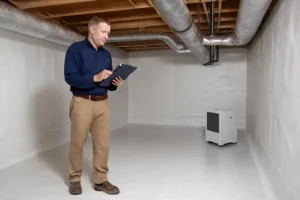
Professional Cleaning
Proper ductwork decontamination is not a shop-vac and a prayer. A trained crew uses mechanical agitation tools that match the duct type, a negative-air machine to put the system under controlled negative pressure, and HEPA-filtered vacuums to collect loosened residue. Returns and supplies are isolated and cleaned one section at a time. Registers and grilles are removed and cleaned separately. The blower compartment is opened and cleaned thoroughly, and the blower wheel is washed or replaced if loading is heavy. Evaporator coil faces and drain pans are cleaned using coil-safe chemistry. All spent filters are removed and bagged. Odor control options, like hydroxyl or ozone, are only used after source removal, not as a shortcut. If you try to perfume soot, you will just end up with floral campfire.
Cleaning lined or insulated ducts is tricky. If the acoustic liner is saturated or charred, that section is a candidate for replacement. Same goes for duct board with a stubborn embedded odor. Smooth, bare sheet metal is the easiest to return to pre-loss condition.
Sealing After Cleaning
Once the dust is out, you do not want new dust getting in. All joints, seams, and connections should be sealed with approved duct mastic or appropriate sealant tape that meets code. Boot-to-drywall gaps should be sealed so the system does not draw attic or wall cavity air loaded with residual particles. Exterior wrap insulation that is damaged or smoke-stained gets replaced. Sealing is a quality-of-life measure that keeps the now-clean system clean.
Replacement Steps
When sections are burned, misshapen, or non-cleanable, replacement is straight-forward. Remove the damaged runs back to clean, solid material. Replace with ductwork that meets or exceeds the original size and insulation value. Use proper supports so the new flexible duct does not kink and starve airflow. Seal every joint, boot, and penetration. If you are replacing an air handler or internal insulation, stick to manufacturer-approved parts and methods. Cutting corners is a great way to buy a second project in six months.
What Proves It Is Safe To Run?
We don’t guess. We verify with clearance sampling. This is a round of measurements and inspections after cleaning or replacement to confirm the system is actually safe to operate. Depending on what burned and how severe the loss was, a clearance package can include several of the following.
First, a detailed visual inspection under good lighting. There should be no visible soot on duct walls, registers, coil faces, or blower blades. Second, nose check. No persistent smoke odor during an HVAC run test, including from multiple registers and returns. We combine that with surface sampling of registers or duct interiors using swabs or wipes that screen for soot markers. For airborne checks, particle counters compare run-time PM2.5 and PM10 inside the home to baseline readings in a clean control area and outdoors. If plastics or synthetics burned, VOC screening is smart to confirm no lingering off-gassing is coming from the system. For multi-family or commercial jobs, we may add black carbon-specific sampling when warranted.
Passing criteria are project specific but anchored to recognized guidance. Visual cleanliness and proper containment methods are core parts of the NADCA ACR Standard. The EPA calls out fire smoke as a legitimate reason to clean ducts and stresses that only cleaning that addresses the sources is acceptable. You can see the EPA’s consumer guidance here: Should You Have Your Air Ducts Cleaned?. For fire and smoke work in general, restoration pros also follow IICRC fire standards for cleaning and odor removal in occupied buildings.
What counts as a pass on particles or VOCs typically involves comparing to pre-loss or outdoor/control levels, not a one-size-fits-all number. The goal is simple. Clean surfaces, no smoke odor, particle readings back to normal for your area and time of day, and no soot identified on clearance swabs. If those boxes are not checked, the system does not get put back in service, and we keep working until it does.
Clean Or Replace Indicators
Heat exposure is the first deal breaker. If metal is warped or discolored from heat, if plastic boots are melted, or if insulation is charred, you are replacing. Material type is the second. Bare sheet metal cleans up well with the right agitation and collection. Flexible duct is the fragile cousin. If the inner core is contaminated or heat stressed, replacement is the safer move. Duct board and lined duct are in the middle. If the core absorbed odor or soot beyond the surface, keeping it turns your HVAC into a memory foam mattress for smoke.
Age and condition matter. Ducts may have a service life around 15 to 25 years, depending on material and care. If your ductwork is pushing that range and already had crushed sections or poor insulation, a fire event is a good time to upgrade rather than sink money into marginal materials. You can find general replacement guidance here: HVAC.com on ductwork lifespan.
What burned also guides your call. Kitchens with plastics, foam, and grease in play leave heavy, sticky soot that can cling to coils and duct interiors. Electrical fires often leave harsher residues. If the HVAC was running during the fire or during the first round of cleanup, assume wider distribution and plan accordingly.
Preventing Recontamination
Step one is easy. Keep the HVAC off until containment and source removal are underway. Running the blower while soot is loose is the fastest way to turn a one-room loss into a whole-house headache. During initial cleanup, cover registers and returns so debris from demolition and cleaning does not rain into the duct system. Use negative air in the work area so migration is controlled. When it is time to restart the system, use a fresh filter with a higher MERV rating the system can handle, and plan a couple of early filter changes in the first month of operation because post-project dust from final punch items is normal.
Longer term, have your HVAC tech confirm the cabinet is tight, gaskets are intact, and there are no gaps that would let attic or garage air get pulled in. Seal boots to drywall. Confirm condensate drains are clear so you do not grow a side hustle in the coil pan. Keep humidity in check, and vacuum with HEPA while the house is settling back into its groove. Those small steps stop new dust from undoing your ductwork decontamination.
Costs And Timelines
Costs scale with size, complexity, and how ugly the residue is. Light to moderate post-fire duct cleaning can land in the 500 to 3,000 range for a typical home, depending on how many supplies and returns you have and whether the air handler needs extra attention. All Nation Restoration outlines those ranges in its breakdown of fire restoration costs: Fire Damage Restoration Costs.
Replacement is a different animal. Swapping a couple of flexible duct branches might be a few hundred to low thousands including materials, labor, and sealing. Replacing large runs of duct board or re-insulating big sheet metal trunks can climb quickly. Full-system duct replacement in a whole house can reach five figures when access is tight or when code-driven upgrades are needed. There is no honest way to price that without an onsite inspection and a layout drawing, but generally, replacement runs a multiple of cleaning because you are paying for demolition, new materials, and installation trades rather than just cleaning labor and equipment time.
Timelines are shorter than most people expect unless you are in a large or complex building. A single-family home with light to moderate contamination might be assessed, cleaned, sealed, and tested in one to two days. If sections need to be replaced, add another day for demo and install. Large homes or multi-zone systems can take several days including scheduling clearance sampling and getting lab results back for surface swabs. Add time if you are coordinating with insurance, other trades, or if the air handler needs parts.
Mistakes To Skip
Do not run the blower before the sources are controlled. That just confetti-cannons soot into all the rooms you were hoping to save. Do not smear soot around with the wrong chemistry. Protein and synthetic residues need specific cleaners and controlled agitation. Do not try to mask odor instead of removing the source. Fragrance on top of combustion by-products is not a win. Do not ignore hidden components like the coil, plenum, and blower wheel. If they are dirty, your system will re-contaminate pristine ducts. And do not skip clearance sampling. If you did not measure the result, you are guessing.
How To Hire The Right Help
Ask about certifications that match the work. For duct cleaning, NADCA credentials indicate the contractor follows the ACR Standard and uses proper containment and HEPA capture. For fire and smoke restoration, IICRC training is a solid marker that techs know how to remove soot and odor sources correctly. Verify licensing and insurance, and ask for recent references specifically for post-fire ductwork decontamination.
Confirm they will perform and document clearance sampling. You want photos of pre-cleaning conditions, containment setup, cleaning methods, and after-photos of coil faces, blower housings, and duct interiors. Ask what particle or surface sampling they use and what pass criteria they propose. Make sure they own or can source the right equipment, including negative-air machines, rotary brushes that match your duct type, and HEPA vacuums. Finally, get a detailed scope and price that calls out what will be cleaned or replaced, what will be sealed, and how access panels will be closed and sealed when the work is done.
Real-World Snapshots
Kitchen flare-up, single-story home, HVAC running during the commotion. We found light to moderate soot in returns and first several feet of supply lines, with the blower wheel showing visible loading. The coil face was dusty but not greasy. We cleaned returns and supplies with negative air and mechanical brushing, washed the blower wheel, cleaned the coil with coil-safe chemistry, replaced the filters, and sealed boots. Clearance sampling included visual, odor checks, and particle counts that matched outdoor levels during an HVAC run test. No replacement needed. The lingering odor left the building the same day.
Garage fire involving plastics, flexible duct routed through the affected space. The inner cores of two flexible ducts were heat wrinkled and smelled like burnt electronics. Those runs were replaced back to the main trunk. We cleaned and sealed the remaining sheet metal trunks and replaced smoke-stained exterior wrap insulation. Because synthetics were involved, we added surface swabs on a couple of registers and VOC screening. Results cleared after work day two. System back on line, no trace odor when the thermostat called for cooling.
Pro Tips That Pay Off
If you smell smoke every time the system starts, cleaning alone might not cut it. Sheet metal ducts tend to clean like a champ, but duct board and heavily charred insulated ducts are common candidates for replacement. Always sample after you think you are done, not before. Do not wait to shut the HVAC off when a fire starts. That one move can save you thousands by stopping soot from getting a free tour of your home. When you put the system back online, plan for fast filter changes, since a newly cleaned system will catch leftover dust from other trades and final cleaning.
Ready For An Inspection?
If you are stuck deciding between cleaning, sealing, and replacing, start with a real assessment. A short visit from a restoration pro can tell you whether your system needs a toothbrush, a tune-up, or a transplant. We handle the cleanup, the ductwork decontamination, the sealing, and the clearance sampling so you can run the system without turning your living room into a smoke machine. If you want straight answers and proof it worked, bring in a team that lives and breathes this work, just not the smoke.