Central Texas plays it cool nine months out of the year, then a blue norther sneaks in and turns your outdoor or garage-mounted tankless water heater into a very expensive ice cube. If you were here for 2021, you know exactly how ugly that looks. This guide brings the two things you actually need when the temps plunge: tankless heater winterization that works in our climate and a rupture containment protocol if you hear the dreaded hiss, pop, or waterfall. I’ll show you what to do before the freeze, what to do the second something cracks, and how to dry fast so mold doesn’t crash the party.
Why Central Texas Gets Burned by Freezes
We don’t live in a daily deep-freeze, which is exactly why cold snaps hurt us more. Homes around Austin, San Marcos, and all across the Hill Country are packed with outdoor tankless units, garage installs, and long runs of exposed copper or PEX that are great for everyday efficiency and terrible for once-every-few-years arctic blasts. When temps dive to 32 degrees and keep falling into the teens, water inside small lines and heat exchangers expands as it freezes. That expansion wins every time. During the 2021 event, thousands of tankless and pipe ruptures were documented across Texas, and plenty of those were from units that were otherwise perfectly installed and maintained. If a unit is outside and unprotected from wind, or if downstream piping isn’t insulated, it’s a freeze waiting to happen.
How Tankless Units Freeze and Rupture
Most modern tankless units include some level of built-in freeze protection. That can mean electric heat pads or smart logic that fires the burner to keep components above freezing. Here’s the catch: those features rely on power and, in many cases, gas availability. If the electricity is out or a breaker is tripped, that protection is taking the night off. Even with power, the unit can keep its core components warmer while exposed inlet and outlet pipes, isolation valves, condensate lines, and relief valves sit out in the cold. Those exposed bits are the weak links that often crack first.
Manufacturers like Navien and Noritz explain the limits well: keep power on, keep gas on, insulate lines, and drain the unit if it will be idle during severe cold. If you’re dealing with an outdoor install that gets direct wind, the wind-chill effect accelerates ice formation inside tight bends and fittings. The endgame is usually a hairline split that doesn’t show itself until thaw, followed by a sudden pressurized leak when the water starts moving again. That’s when walls, garages, and flooring get soaked in minutes.
Tankless Heater Winterization Checklist
You don’t need to live like a polar explorer to keep a tankless unit safe. You just need to address the simple failure points before the next hard freeze.
Keep Power and Gas On
Freeze protection features only work if they’re powered. Confirm the unit has AC power and the gas valve is open. If you plan to be out of town during a cold front and don’t want to leave it powered, then drain it properly. Manufacturer guidance is clear here: power equals protection. If the grid looks wobbly, consider a small backup power solution sized for the unit’s freeze circuitry.
Insulate Every Exposed Inch
Foam pipe insulation is good. Foam plus heat trace is better. Wrap exposed hot and cold lines, isolation valves, and fittings with quality insulation and add UL-listed heat tape on the most vulnerable runs. Don’t forget the pressure relief line and the condensate drain on condensing models. A tiny uninsulated elbow has ruined many a morning.
Shelter the Unit From Wind
If your unit is outdoors, protect it with a manufacturer-approved cover or a vented, non-combustible enclosure that blocks wind. Don’t position the unit where an AC condenser blasts frigid air at it in winter. A little wind control goes a long way toward preventing internal ice crystals.
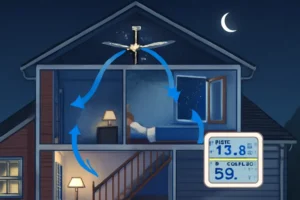
Keep Water Moving During Cold Snaps
A steady trickle can keep lines from freezing in marginal temps. Let the hot tap at the furthest fixture run slightly to maintain flow through the unit and the longest branch lines. Owners with recirculation systems can schedule short intervals to pulse warm water overnight.
Drain for Severe Forecasts or When You’re Away
If a strong freeze is coming and you’ll be gone, shut off water to the unit, cut power and gas, open hot taps, and drain the unit per your manufacturer’s instructions. Some models have easy drain ports. If your unit sits outside without robust protection, draining during extended cold is cheap insurance.
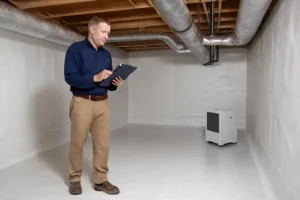
Don’t Forget The Garage
Garage-mounted units feel “indoors,” but uninsulated garages can hit freezing fast. Treat them like an outdoor install: insulate lines, use heat trace where needed, protect the condensate line, and close drafts around garage doors.
| Forecast | What To Do |
|---|---|
| 30 to 32 degrees overnight, light wind | Confirm power and gas, trickle a hot tap, insulate exposed lines |
| Mid 20s for 8+ hours or windy | Add heat trace to exposed lines, run recirculation or trickle, shelter the unit |
| Teens or lower, possible power loss | Drain the unit if you can’t ensure power-keep heat trace running on a backup or shut off and fully drain |
If you want manufacturer guidance to back this up, check resources from Navien and Noritz on freeze protection and draining procedures. They spell out the same fundamentals: keep it powered, insulate lines, and drain when in doubt.
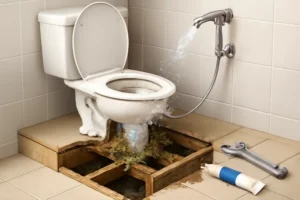
What If Your Unit Cracks Tonight?
If you open a faucet after a freeze and hear the symphony of water behind a wall or see a spray at the tankless cabinet, you’re in rupture territory. Your goal is to kill the water supply, then control where the rest of the water goes while you stage repairs and drying. Do these five things fast:
1) Shut off water to the tankless unit. Use the cold inlet isolation valve or the main shutoff for the house if you can’t reach the unit. 2) Kill power to the tankless and close the gas valve for safety. 3) Open a nearby hot tap to relieve pressure. 4) Set down buckets, trays, and towels to catch what’s still draining. 5) Move anything valuable out of the splash zone, especially cardboard boxes, rugs, and electronics.
Rupture Containment Protocol That Works
The rupture containment protocol is your playbook for the next hour. Shutoff stops the bleeding, but water already traveled into walls, floors, and cabinets. You want to contain, extract, and stabilize fast so you’re not funding a mold remodel next month.
Start by capturing leak water. Use pans, storage totes, or clean trash bins under the unit or any visible drips. Line floors with plastic or thick towels to keep water from migrating under baseboards. If there is a cabinet, remove the kick plate to let water drain into a pan instead of wicking into particleboard. If the unit is outside and water is flowing out of an enclosure, redirect it away from siding and door thresholds.
Next, pull the remaining water out. A wet vacuum or small pump can remove standing water from garage slabs and utility rooms quickly. The sooner you get bulk water out, the less you’ll fight humidity and wall saturation.
Open access points without creating a mess. Remove the lower few inches of baseboard to expose the bottom of the wall cavity. If drywall is wet near the floor, a controlled cut across the base can release moisture and air out the cavity. Don’t take a chainsaw to it, but do create openings that let air movers and dehumidifiers work.
Document everything while you work. Shoot photos of the tankless cabinet, the split pipe or fitting, and any rooms with wet walls or flooring. Take a quick video showing how far water traveled. If you have a moisture meter, log readings on drywall, trim, and flooring. Insurers like proof, and your future self will like knowing you didn’t miss a wet spot.
Drying The Damage Before Mold Moves In
Mold isn’t a later problem. It starts right away when wet materials sit in a humid room. Your goal is to get the area below 60 percent relative humidity and keep airflow on wet surfaces until materials hit their dry standard. That usually means a combination of high-capacity air movers to push air across surfaces and a dehumidifier pulling moisture out of the air. Fans by themselves can move moisture into the rest of the house, which is not the plan.
Start with extraction to remove bulk water. Then deploy air movers across the wet perimeter, aimed along walls, not straight into them. Set a dehumidifier in the same zone to drop humidity. If drywall is saturated more than surface-deep, cut a narrow strip near the base to relieve trapped moisture. Wet baseboard and trim should come off early so the wall can actually dry. Cabinets get tricky because particleboard swells fast. If a vanity or kitchen cabinet took on water, remove the back panel for airflow or detach the unit to dry behind it.
Apply an EPA-registered antimicrobial to surfaces after visible dirt and debris are gone. That product helps control bacteria and mold growth, but it doesn’t replace actual drying. Keep a log of temperature, humidity, and moisture readings daily. Many small leaks dry in 2 to 4 days with proper equipment. Deep soaks in insulation, subfloors, or dense flooring take longer. If you want a certified team to run this process with industrial gear and a clean paper trail, our crew at All Nation Restoration does it every day across Central Texas.
Thawing Myths To Skip
Bad internet advice multiplies during freezes, so let’s keep you out of trouble. Don’t use an open flame or a propane torch to thaw lines near your tankless. That’s how fires start inside walls. Space heaters stuffed inside an enclosure can overheat components or melt wiring harnesses. If you must thaw a frozen condensate line or exposed pipe, use a hair dryer on low, a warm towel, or heat trace tapes rated for plumbing.
Another myth: cranking the temperature way up on a frozen or recently frozen unit will thaw it faster. If ice already split a fitting, extra heat can trigger a bigger rupture. Keep the unit off until a licensed plumber inspects it. Manufacturer guidance and consumer resources agree: gentle, controlled warming is safe, and anything that scorches or flames is not.
When To Call All Nation Restoration
If you’ve got standing water, creepy humidity, or a wall that feels like a wet sponge, get help. Our certified techs handle emergency extraction, structural drying, antimicrobial treatment, and mold remediation when needed. We work with licensed plumbers to repair burst pipes and compromised tankless connections, and we document everything for your insurance carrier so you don’t have to translate the mess. Start at our Water Damage Restoration page, or call our Plumber Repair and Water Damage team for 24-7 help.
Insurance and Documentation Tips
Insurers expect you to stop the damage. That means shutting off water, doing basic containment, and starting drying where you can. Take timestamped photos before you move items, then again after you set up containment. Keep close-ups of the split pipe or ruptured fitting at the tankless cabinet, plus wide shots showing wet walls and floors.
Save receipts for supplies like insulation, heat tape, and equipment you rent. If a plumber or restoration company visits, ask for line-item invoices and moisture logs. Don’t toss wet materials that were removed until your adjuster says you can. If you drained the unit or made a temporary fix, note the time and the steps you took. That timeline helps show you acted quickly to reduce the loss.
FAQ: Tankless Freezes and Water Damage
Will the built-in freeze protection save me?
Sometimes, but it depends on power and installation. If the breaker trips or the grid goes down, that protection is out. Even with power, exposed pipes and valves can still freeze. Think of freeze protection as the seatbelt, not the airbag and the roll cage. Use insulation, heat trace, and wind protection to back it up.
Is dripping a faucet enough in the teens?
It helps, especially on long runs, but it’s not a magic trick. In the teens with wind, you should combine a small hot-water trickle with insulation and, ideally, heat trace on exposed lines. If you can’t ensure power to the unit, draining it is the safer choice.
How long before mold starts?
Microbial growth can begin within 24 to 48 hours on wet drywall and wood in warm interiors. That’s why extraction and dehumidification should start right away, not next week. The faster you get humidity down and airflow up, the less demo you’ll need later.
Can I run the heater after it thaws?
Not until a pro inspects it. A cracked heat exchanger or split fitting can turn a small leak into a flood the moment it fires. Keep power and gas off to the unit and have a licensed plumber verify integrity before you restart it.
Should I drain the unit every cold snap?
If it’s a mild freeze and you can guarantee power and insulated lines, you don’t need to drain. If you’re leaving home or a harsh front is forecast with possible outages, draining is the safer route. Follow your manufacturer’s drain procedure and open downstream faucets to relieve pressure.
Do recirculation systems prevent freezing?
They help by moving water in the lines and keeping temps a bit higher. They’re not a cure-all. Combine recirc with insulation, heat trace on exposed runs, and wind protection around outdoor installs.
Extra Local Tips That Actually Help
Central Texas homes love PEX for its flexibility, and it tolerates freezing better than copper, but fittings are still vulnerable. Insulate those brass connections. Watch the condensate drain on high-efficiency units, since a frozen condensate line can back water up into the unit. In garages, drafty door seals are your enemy. A simple weatherstrip kit can keep that space a few critical degrees warmer.
Finally, stage your cold-front kit now. Label the water shutoff for the tankless unit, keep a multi-tool and flashlight in the cabinet, and store a few absorbent pads or old towels nearby. If you end up needing the rupture containment protocol at 3 a.m., you’ll thank yourself for the easy reach. And if things get out of hand, our team at All Nation Restoration will roll in with the pumps, dehumidifiers, and certified techs to get you dried out and back to normal faster than the forecast warms up.