Mold, water, and fire risks do not give warnings. Fast action saves walls, floors, and indoor air quality. I run a mold remediation company that lives in the details. We track moisture to the inch. We dry on a clock. We teach prevention so your home stays healthy. This article gives you a pro level look at thermal imaging mold detection, practical fire safety for lithium ion batteries, and the steps that protect your home after fish tank water damage. If you live in Austin, my crew responds day or night. We document what we find, fix the source, then dry to standard.
Thermal imaging mold detection
Infrared thermography has changed how we find water in walls and ceilings. A thermal camera displays surface temperature patterns. Wet materials often show a cooler signature due to evaporation and altered thermal properties. The camera does not see moisture. It shows temperature differences that point to possible wet zones. That single distinction sets the professional workflow. Scan with infrared, verify with moisture meters, then create a moisture map that guides targeted drying and minimal removal.
FLIR’s guidance is clear on this point. Thermal imaging helps find anomalies, then meters confirm whether the spot is actually wet. You get faster decisions with less guesswork, which limits demolition and speeds drying. See FLIR’s overview on leak detection with thermal imaging for pattern examples and method tips at flir.eu.
The standard of care matters. ASTM C1060 describes qualitative infrared inspections of buildings. The standard calls for independent validation of what you see in the camera view. That means use a meter, visual inspection, or, in some cases, a small opening. The overview sits at the ANSI store at webstore.ansi.org. For water damage work and mold remediation, the IICRC standards guide the process. S500 covers water damage restoration, psychrometrics, and documentation. S520 is the current mold remediation standard with a 2024 update. Learn more at iicrc.gilmoreglobal.com and the ANSI blog at blog.ansi.org.
Our Austin team follows that model on every project. We scan, measure, plot, then recheck during drying. You get a clear plan that respects your time and your home.
What thermography shows and what it does not
Infrared cameras read emitted thermal energy. The display translates that energy to a temperature map. This map highlights building features that differ in temperature from their surroundings. Evaporation from wet drywall cools the surface, which often shows as a darker patch compared to dry areas. Air leakage, missing insulation, or thermal bridging can show patterns that mimic moisture. Meter checks sort out which spots are wet and which are not.
Common moisture signatures include diffuse blotches on ceilings, gravity created streaks on walls, or triangular shapes pointing down from the top plate. Plumbing lines in ceilings form bands with cooler halos below. Exterior wall leaks can present as vertical or diagonal tracks near window corners. We record each anomaly, then meter it in pinless mode to map the footprint, then use pin probes for quantitative confirmation. FLIR details the need to confirm IR targets with moisture meters at flir.eu.
Inspection conditions matter. For building envelope energy scans, many thermographers precondition the structure with an indoor to outdoor temperature difference near ten Celsius or eighteen Fahrenheit for a few hours. That delta helps reveal insulation defects. For wet materials, evaporation can create contrast even without a strong delta. Still, control of relative humidity and awareness of surface emissivity improves results. Good primers on delta T and building scans are available at irinfo.org and theramreview.com.
Meter verification and moisture mapping
Moisture meters turn a thermal image into a plan. A pinless meter works well for fast, non destructive mapping. These readings are relative. You sweep the area to trace the boundary of elevated moisture compared to known dry reference spots. A pin meter adds quantitative data. It reads percent moisture content or wood moisture equivalent depending on material and meter settings. FLIR notes that pinless values are relative. Pin values provide ranges suited to species and conditions. See their meter notes at flir.custhelp.com and an example meter manual at manuals.plus.
A full map includes thermal images with spots marked, meter readings, material notes, and psychrometric data. We record ambient temperature, relative humidity, and grain depression. We calculate dew point risk for surfaces during drying. That keeps condensation from offsetting progress. The EPA recommends indoor relative humidity below sixty percent. The ideal target lands between thirty and fifty percent for comfort and mold control. See the EPA guide at epa.gov. Some IR systems include a condensation alarm when you feed in ambient targets and surface emissivity. FLIR offers support content on that feature at support.flir.com.
Once the map is set, we open the least amount of material to access the cavity or to relieve trapped water. Targeted openings speed dry time and reduce rebuild cost. The IICRC S500 process supports that plan with equipment selection, humidity control, and documentation at each step. You can read the S500 overview at iicrc.gilmoreglobal.com.
Water hides behind baseboards and under floors. Thermal imaging shows the pattern, then we meter to confirm. Pros detect hidden moisture and speed drying. Proper airflow and dehumidification complete the plan.
Drying windows and mold prevention
Mold does not wait. Wet drywall, wood, or carpet can support growth if not dried quickly. The EPA calls for drying within twenty four to forty eight hours. Miss that window and removal often becomes necessary. Good airflow and humidity control reduce that risk. We aim for indoor relative humidity below sixty percent by the end of day one. The EPA guidance sits at epa.gov.
Active leaks cause cycles of wetting that defeat drying. Fix the source first. A licensed plumber handles supply lines, valves, and drain piping. If you do not have a plumber, we can coordinate. Start with source control, then drying. Use our quick guide to coordinate trades at Find and fix the leak at the source.
When to call a pro in Austin
Call a pro when you see stained ceilings, musty odors, or baseboards that pull away. Call a pro when a bathroom or laundry room floods. Call a pro when you do not have the tools to confirm drying. An infrared scan combined with meter readings gives a faster path to normal. Our team can also provide temporary containment if the area shows visible growth during discovery. S520 sets the language and goals for mold remediation. That includes containment, negative pressure where needed, and clearance conditions. Read about the 2024 edition at blog.ansi.org.
If you want to get started now, call us for step by step advice on your immediate tasks. See our quick action page at What to do first after a large water spill. If you are price shopping, you can review typical questions on our cost page at Typical water damage repair costs and deductibles. We want you to hire the right team for your situation. Read our short guide at Choosing the right restoration company.
Lithium ion battery fire safety
E bikes, scooters, and cordless tools bring convenience. They also bring specific fire risks that deserve respect. Most incidents start with charging. Some start with damage to a pack from impacts or heat. The good news is that simple habits cut risk dramatically.
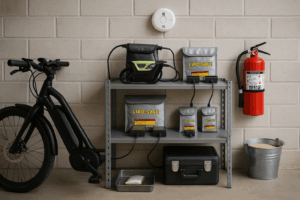
Buy, charge, and store with safety in mind
Start with certified systems. For e bikes, look for UL 2849 certification for the electrical system. UL evaluates the battery, charger, and motor controller as a system. See details at ul.com. Use only the charger that came with the device or a manufacturer approved replacement. The Consumer Product Safety Commission urged buyers to avoid universal micromobility chargers due to fire hazards. Read the advisory at prnewswire.com.
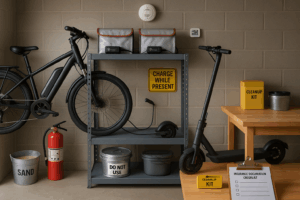
Do not charge while sleeping. Keep batteries away from exits so a device does not block your path if it ignites. Store and charge at room temperature. Maintain clear space around charging stations. UL Standards and Engagement offers simple tips that match fire service guidance. Find them at ulse.org. The US Fire Administration gives similar advice. See their homeowner page at usfa.fema.gov.
Watch for warning signs like odor, excessive heat during charging, swelling of the pack, leakage, smoke, or odd noises from the pack. Stop use if you see any of these. Move the item outside if it is safe to do so. Contact the manufacturer for guidance.
If you live in a multifamily property, talk with your manager about charging policies. Review home fire safety basics today at Fire prevention basics for properties. Commercial properties have additional options such as fixed suppression. Learn the basics at Understanding fire suppression options.
Disposal and what to do after a battery fire
Do not place lithium ion batteries in the trash or curbside recycling. Tape the terminals. Place each battery in its own bag. Use a drop off program or a battery retailer that accepts spent cells. The EPA provides guidance on used battery handling at epa.gov.
If a battery fire happens, evacuate and call 911. These fires can escalate fast. Do not attempt to suppress a growing thermal runaway with a household extinguisher. Devices can re ignite after the initial event. Fire service guidance warns of re ignition hours later due to damaged cells. See training resources at firehouse.com and the IAFC resource page at iafc.org. FDNY public safety posts reinforce the do not attempt message for residents. See an example at nyc.gov.
After the event, ventilation and cleaning become priorities. Soot and corrosive byproducts can damage electronics and finishes. Document damages for your insurer. Then call a restoration team with electronics cleaning partners if devices were exposed to smoke or corrosive residue.
Fish tank water damage
Few household leaks release more water faster than a failed aquarium. Even a small crack can send gallons across floors within minutes. The water carries organic load from the tank. That changes the cleaning approach. The best outcome comes from prevention. If a failure still happens, quick, safe steps protect the home and prevent mold.
Stands, leveling, and placement
Support starts at the base. Match the stand to the tank type. Many framed glass tanks are designed to bear weight on the perimeter rim. Rimless glass and many acrylic models need full bottom support. Manufacturer guidance from Aqueon gives clear instructions for support, leveling, and placement. Read more at aqueon.com.
Level the stand on stable flooring. Use shims only if the maker allows it. Confirm the top is flat before filling. Avoid direct sunlight on the glass. Keep the tank away from HVAC supply vents. Plan hose routing and filter access so service does not strain joints. These small details help preserve seams and prevent stress on panels.
Weight matters. Water weighs roughly ten to twelve pounds per gallon. A seventy five gallon tank with rock, substrate, and equipment can exceed eight hundred pounds. Floors in typical US homes are designed for a live load near forty pounds per square foot. Large tanks need careful placement near bearing walls or across joists. For very large tanks, consult a structural engineer. Marineland provides a beginner guide that helps with placement basics at marineland.com. For a builder view of live loads, see JLC’s guidance at jlconline.com.
Add a leak alarm. Place sensors at the base of the stand. Cable style detectors sense water along their full length. Good examples include the Honeywell Lyric detector at honeywellstore.com. Whole home flow monitors can auto shut the main for plumbing leaks. Tanks are not tied to the home plumbing loop, but these tools still protect the rest of the house. Review our homeowner checklist to reduce risks across the home at Prevent water damage at home.
Leak alarms and floor load considerations
Leak sensors buy you time. Early alerts reduce gallons on the floor. Place sensors behind the stand where water first collects. Set a notification to your phone. Test the alarm during setup with a small cup of water. Clean up after the test so no moisture lingers against wood trim.
Think about your floor as a structural system. Floor joists carry loads to bearing walls and beams. Placing the tank so joists support the load at multiple points helps. A tank that sits parallel to joists with no blocking under it can bounce and cause stress. A tank that sits near a wall with joists perpendicular spreads load better. Builders often add blocking or a small beam for large setups. A quick check with a contractor gives peace of mind.
Cleanup steps and when insurance may help
Safety first. If water reached outlets or power strips, cut power at the main breaker from a dry location. Do not operate switches while standing in water. The CDC has a clear safety guide for electrical hazards at cdc.gov. Unplug aquarium equipment once safe. Move fish to a temporary tank if possible.
Extract standing water quickly. Wet vacs work well for small areas. For larger spills, use a submersible pump with a discharge hose to the exterior. After removal, set dehumidifiers and fans to create cross airflow. Vent to the outside to exhaust humid air. Keep indoor humidity below sixty percent to slow mold growth. The EPA’s mold guide sets the drying window at twenty four to forty eight hours. That time frame applies to walls, floors, and contents. See the EPA page at epa.gov.
Treat contamination correctly. Aquarium water is not clean water. It contains organics that raise microbial levels. Restoration trade guidance places broken aquariums in Category 2. That calls for cleaning and removal of affected porous materials that cannot dry quickly. Disinfect non porous surfaces before structural drying. Legend Brands explains water categories at legendbrands.com.
If the spill is heavy, a pro team will bring extraction tools, HEPA filtration, and desiccant or refrigerant dehumidifiers. We meter walls, baseboards, and flooring to confirm progress. We also protect HVAC systems from spreading contaminants. If you want to use professional tools without a full service crew, we can help you source what you need. See our rental page at Rent professional water removal equipment.
Read our at home guide for safe cleanup moves that protect your health. The tips cover PPE, ventilation, and drying order. Start there if you plan to begin before we arrive. Visit DIY flood cleanup tips.
Take photos before moving items. Start a list of damaged contents. Keep damaged items until your adjuster documents them. Call your insurer to discuss coverage. Some policies include sudden and accidental discharge. Others exclude tank failures, which vary by carrier. Our cost guide explains common drivers of price, time, and materials. Read more at Typical water damage repair costs and deductibles.
Once the area is dry, test for moisture behind trim before reinstalling baseboards. Replace pad if carpet was saturated. Inspect subfloors for swelling or delamination. If odors persist, a targeted cleaning of cavities may be needed. Mold can begin on the back of drywall if the drying window is missed. In that case, a small removal with containment prevents spread to clean areas. We follow IICRC S520 methods for that work to protect your home and your family.
Immediate steps help. Cut power if unsafe conditions exist. Stop the leak. Start extraction. Call for help if you see buckling floors, sagging ceilings, or wall swelling. You can find quick actions on our help page at What to do first after a large water spill. If a supply line or filter leak caused the event, schedule a plumber to prevent a repeat. Use our resource page to coordinate repairs at Find and fix the leak at the source.
Prevention stays smarter than response. Place mats under stands to catch drips during maintenance. Inspect seals during water changes. Replace brittle tubing before it fails. Never place power strips on the floor near the stand. Add a drip loop to every cord to keep water away from outlets. These simple habits cut risk and protect finishes. For broader home protection, review our guide at Prevent water damage at home.
How thermal imaging helps after a tank leak
Even shallow spills can wick into baseboards and drywall. Thermal imaging shows where water traveled, which keeps removal small. A typical map after an aquarium event will show cool bands along the base of walls, moisture trapped in plates, and possible movement under floating floors. A pinless meter traces the footprint to the corners. A pin meter confirms depth of wetting. We then set focused airflow to the wet zone with dehumidifiers sized for the cubic footage and the moisture load. We re image during drying to confirm progress. Documentation supports your claim and protects you during future sales or rental turnover.
Austin service call
Thermal imaging mold detection allows fast, non destructive decisions. Lithium ion battery safety habits prevent life changing fire events. Smart aquarium setup avoids preventable water loss. If damage happens, you need a capable team. We arrive fast. We bring infrared cameras, pin and pinless meters, borescopes, and full scale drying equipment. If you want a consult first, we can walk you through safe steps by phone. Call us day or night. If you prefer to start with a read, visit our action page at What to do first after a large water spill.
When you compare restoration firms, ask about training, equipment, and documentation. Ask about IICRC certified technicians and real time psychrometric logs. Review our short buyer guide at Choosing the right restoration company. If you need a hand with hidden leaks or heavy drying, we are ready to help. If you want pro advice and tools for a DIY approach, we can help with that too. Visit Pros detect hidden moisture and speed drying.
Key facts at a glance
Dry wet materials within twenty four to forty eight hours to prevent mold. Source: EPA.
Thermal cameras do not see moisture. They display temperature differences. Meters verify wet spots. Source: FLIR.
For building envelope scans, many pros aim for an indoor to outdoor temperature difference near ten Celsius or eighteen Fahrenheit for a few hours before the scan. Source: Infraspection Institute.
E bike systems certified to UL 2849 reduce risk. Use only the supplied charger. Avoid universal chargers. Sources: UL Solutions and CPSC advisory.
Never place lithium ion batteries in household trash. Tape terminals and recycle. Source: EPA.
A seventy five gallon aquarium can weigh over eight hundred pounds. Typical floors are designed around forty pounds per square foot live load. Sources: Marineland and JLC.
Broken aquariums are treated as Category 2 water losses. Source: Legend Brands.
If outlets or devices are wet, shut power off at the main from a dry spot. Do not touch switches while standing in water. Source: CDC.
Healthy homes start with fast detection, safe power, smart drying, and good habits. Thermal imaging mold detection offers a precise view of where to act. Lithium ion battery safety protects families. Prevention keeps a fish tank from becoming a flood. If you need help in Austin, call us. We are ready to respond with meters, thermal imaging, and the drying power to return your home to normal fast.