Mold behind wallpaper is sneaky. It feeds on paper and glue, hides in darkness, and spreads when moisture gets trapped. In this guide I will show you how to confirm what you are dealing with, how to fix the moisture problem that caused it, and how to remove mold under wallpaper without spreading spores through your home. I will also cover clear signs you should call a professional crew. My team at All Nation Restoration follows proven methods that match EPA, CDC, and IICRC guidance so you can feel confident about the next step.
Why mold grows behind wallpaper
Mold needs three things to thrive. A food source, moisture, and time. Wallpaper offers a steady diet because both its paper backing and the paste that bonds it to drywall are cellulose rich. Add trapped humidity or a small leak and you have a private buffet hidden between the wall and the paper.
Vinyl and other non porous wall coverings can act like a vapor barrier on the room side of the wall. That barrier slows drying after steamy showers or seasonal condensation. Moisture then hangs inside the wall assembly. Warm interior air can push water vapor into the wall cavity where it cools on the backside of the wallpaper or on the paper face of the drywall. The result is repeated damp cycles that support mold growth even when the room side looks clean. Industry coverage has warned for years that misplaced vapor barriers and vinyl wall coverings trap moisture and accelerate hidden mold growth in humid areas such as bathrooms and kitchens. You can read more about this building science problem in resources like WCONLINE which discusses wall assemblies and vapor barrier placement challenges at this article.
Once humidity or a leak sets the stage, darkness and still air behind wallpaper give mold a perfect habitat. That space is protected from regular cleaning and from sunlight. Add repeated condensation or high humidity and the colony grows until it telegraphs onto the surface as stains or bubbling.
On our hidden mold page we highlight how vinyl wallpaper and adhesives create a hidden moisture pocket. We often find colonies spreading unseen across large sections. That is why the first step is always moisture control before any cleaning or paint. The EPA is clear that moisture control is the key to mold control and that materials should be dried within 24 to 48 hours after water exposure to prevent growth. See the EPA guidance at How do I get rid of mold.
How to tell if you have mold under wallpaper
Most homeowners notice a musty odor first. That stale smell that comes and goes is a red flag for hidden mold. Your nose can be one of the fastest tools because odor often shows up before visible damage.
Surface changes are the next clue. Watch for bubbling or peeling seams that do not flatten out after humidity drops. Look for brown, gray, or greenish blotches that seep through paint or paper. Pay attention to walls behind dressers or beds where air circulation is poor. Repeated stains in bathrooms, kitchens, laundry rooms, or basements often point to a moisture problem inside the wall.
Touch can help too. If the wall feels cool and clammy while the room is warm, condensation may be forming inside the assembly. If you have vinyl wallpaper in a bath or in a room with an exterior wall, pay extra attention to edges and corners where vapor can accumulate.
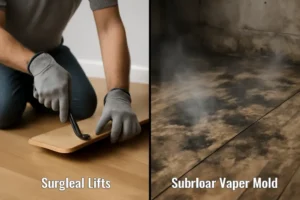
When you need to confirm, carefully lift a small section along a seam or at a loose corner. Wear an N95 respirator and goggles before you disturb anything. Gently peel back a few inches and inspect the paper backing and the drywall surface for dark spotting or fuzzy growth. If you see mold heavily inside the wall cavity or if the damaged area appears large, stop and plan for professional help rather than continuing to expose the area.
Our in house guide on hidden mold behind wallpaper provides a quick checklist. EPA also points out that hidden mold often occurs behind vinyl wallpaper and recommends caution when growth is not fully visible. See the EPA building guide section on hidden growth at EPA Mold Remediation Guide Chapter 5.
DIY removal without spreading spores
If you are set on tackling a small area yourself, the goal is simple. Control the moisture source, reduce airborne dust, remove contaminated materials, and clean remaining hard surfaces with damp methods. EPA guidance suggests that homeowners can often handle small areas under about 10 square feet. Larger areas, hidden growth, or structural water damage call for professional help. See EPA guidance at this page.
Confirm scope and health safety
Measure the visible area. If you suspect the problem extends into wall cavities or across multiple rooms, stop. If anyone in the home has asthma, severe allergies, is pregnant, or is immunocompromised, do not proceed with DIY. The CDC recommends at least an N95 for small jobs and warns that some people should not perform mold cleanup. Review their guidance at CDC Mold Cleanup.
Fix the moisture source first
Repair leaks, correct caulking, or improve ventilation before you start removal. If you have a bathroom with frequent condensation, add exhaust ventilation that actually discharges outside. Use a dehumidifier to keep indoor relative humidity between about 30 and 50 percent. Dry affected areas quickly. The EPA states that drying within 24 to 48 hours after water exposure is the window to keep mold from taking hold. If the wall is still damp, use targeted drying and hold off on removal until moisture readings come back to normal.
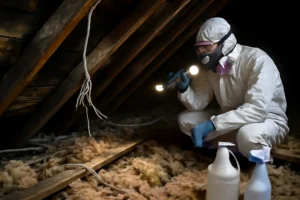
Gather PPE and basic tools
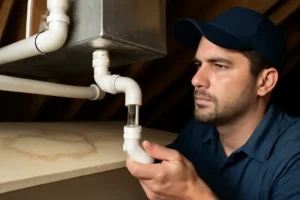
For small jobs wear a NIOSH approved N95 respirator at minimum. Wear safety goggles without vents and gloves that resist moisture such as nitrile or rubber. Disposable coveralls or old clothing you can discard will reduce tracking material through the home. Prepare a spray bottle or pump sprayer with plain water for light misting, a bucket with a mild detergent solution, clean rags, a scrub brush, and heavy plastic bags. A HEPA vacuum is a strong help because it captures fine particles. The CDC has general PPE guidance for homeowners at the link above.
Set up basic containment
Close doors to the work area and turn off the HVAC system so you do not move spores to other rooms. Cover doorways and supply or return vents with plastic sheeting and painter tape. If you can, set up a window fan exhausting to the outside to create light negative pressure. Professionals use HEPA air scrubbers and build containment walls with plastic for this same reason.
Reduce dust and avoid over wetting
Wet methods reduce particle release. Lightly mist the wallpaper surface to keep dust down during removal, but do not soak the wall cavity. Heavy wetting can drive spores deeper and can extend drying time. EPA training material supports damp wiping and cautions against dry brushing that sends spores airborne. See basic cleanup steps at EPA Cleanup Steps and the classroom module at EPA Mold Course Chapter 4.
Remove the wallpaper carefully
Start at a seam and peel slowly. Fold removed sections inward so the contaminated side faces itself. Place sections directly into heavy plastic bags. Seal the bags before moving them out of the room. If adhesive is stubborn, use a scraper but do not sand. If you reveal drywall that is soft, crumbling, or spotted throughout the paper face, full removal and replacement of that drywall section is often the better choice. EPA points out that porous materials like drywall and paper facing are difficult to clean fully once mold is bonded to the fibers.
Discard porous materials that cannot be cleaned
Paper faced drywall, insulation, and wallpaper that show visible growth should be removed and discarded. HEPA vacuuming and damp wiping cannot extract colonies or byproducts from deep in those fibers. EPA guidance recommends discarding moldy porous materials and focusing on physical removal rather than only trying to kill growth with chemicals. See EPA Cleanup Steps.
Clean nearby hard surfaces
After removal wash hard non porous surfaces with detergent and water. Rinse with clean water and dry quickly. Once dry, use a HEPA vacuum on floors, window sills, and trim to capture settled spores. The EPA warns that dead mold can still trigger allergic reactions. Removal is the goal, not just killing it.
Bag, seal, and dispose
Double bag waste and seal before carrying through the home. In most localities it can go out with normal construction debris. If local rules differ, follow those directions. Wipe down pathways and do a last pass with a HEPA vacuum near the work area. The EPA mold course suggests sealing removal bags and cleaning the work path to reduce cross contamination. See EPA Mold Course Chapter 4.
Dry and verify
Run a dehumidifier in the room for several days. Keep interior humidity between 30 and 50 percent. If you own a moisture meter, check the exposed drywall edges and framing until readings match normal levels for your home. If odors return or if new staining appears, there is likely an unresolved water source or deeper hidden growth.
Health cautions and chemical use
The CDC cautions against mixing bleach with ammonia which creates toxic gas. Harsh chemicals are not usually needed for small jobs. Physical removal and damp cleaning are the core steps. If you choose to use a disinfectant, read the label and ventilate. People with asthma or chemical sensitivities should not take part in cleaning. CDC guidance is available at CDC Mold Cleanup.
When to call a professional
There are times when a DIY approach places your home at risk for wider contamination or leaves the real problem unsolved. If any of the following are true, call our team for an inspection.
- The visible area is larger than about 10 square feet or you see growth in multiple rooms. EPA recommends consulting a professional at that scale. See EPA guidance.
- You suspect hidden mold inside wall cavities, under vinyl wallpaper, in HVAC components, or inside built in cabinets. EPA highlights hidden growth behind vinyl coverings in its building guide at this page.
- Someone in the home has asthma, is immunosuppressed, is pregnant, or has persistent symptoms. Our professional mold removal page lists health related triggers for calling a pro.
- Mold keeps coming back after cleaning or you cannot find the moisture source. That points to an unresolved leak, condensation problem, or a vapor barrier trap.
- You see heavy staining that looks slimy or wet on drywall which can suggest Stachybotrys. This requires careful handling and containment.
As an owner operator, I want you to know exactly what a trained crew brings to the table. We perform a moisture focused inspection first, then isolate the affected area with plastic containment and run HEPA air scrubbers to control airflow. We remove contaminated porous materials, clean with damp methods, dry the structure, and perform post remediation verification before we suggest rebuild. Our approach follows the principles in the ANSI IICRC S520 standard which emphasizes physical removal of mold, source control, appropriate containment, and verification. You can read about that standard at the IICRC S520 page.
If you need fast help right now, use our mold removal services page for 24 slash 7 response.
Prevention after cleanup
After the wall is clean and dry, keep mold from returning by controlling moisture and improving the way your walls handle vapor. Mold control equals moisture control. The EPA repeats this message across its homeowner guides for a reason. Fix sources of liquid water and manage indoor humidity. Dry wet materials within 24 to 48 hours whenever possible. See EPA basic mold control.
Start with ventilation. Bathrooms need an exhaust fan that vents outside, not into an attic. Run the fan during showers and for at least 20 minutes after. Kitchens need a range hood that moves real air, again discharging outside. Laundry rooms benefit from make up air and full dryer duct cleaning.
Manage humidity. Keep indoor relative humidity between 30 and 50 percent. Use a dehumidifier in basements and mixed humid climates. A small humidity monitor helps keep track of levels through the day. If your home spikes above 60 percent for long periods, mold is likely to return.
Choose wall coverings wisely. Avoid vinyl wallpaper on exterior walls or in steamy rooms. If you love the look of wallpaper, choose breathable coverings and use adhesives designed for breathability. In bathrooms use high quality paint that resists moisture and allows the wall to dry. If a previous remodel placed a vapor barrier on the interior face of an exterior wall then added vinyl wallpaper on top, you may have a trapped moisture sandwich. A professional assessment can help you correct that assembly during a future remodel.
Improve insulation and air sealing where needed. Cold spots on exterior walls can cause condensation on the backside of wallpaper. Better insulation and air sealing reduce those cold surfaces and reduce vapor movement into the wall cavity.
Keep eyes on plumbing and building envelope leaks. Tiny drips behind a vanity, around a toilet supply line, or at a window flashing can wet drywall slowly and feed mold under wallpaper. Periodically inspect and repair problem areas before they feed a hidden colony.
Set a maintenance routine. Run bath fans, wipe condensation from window sills on cold days, and leave small gaps behind large furniture so air can move. If you repaint or re wallpaper, inspect the wall surface thoroughly with bright light before new coverings go on.
Do and do not for small DIY jobs
- Do fix the water source before removal.
- Do wear an N95 respirator, goggles, and gloves.
- Do use damp wiping and HEPA filtration to limit dust.
- Do remove and discard porous materials that are moldy.
- Do not paint over moldy wallpaper or drywall.
- Do not dry sand or wire brush contaminated surfaces.
- Do not mix bleach with ammonia.
- Do not assume that killing mold means it is gone. Dead spores still cause reactions. The EPA stresses physical removal. See EPA Cleanup Steps.
FAQ
Can I just paint over mold under wallpaper
No. Paint does not remove spores and often peels as moisture pushes out from behind. The EPA states that effective mold cleanup focuses on removal of growth and correction of moisture. See EPA Cleanup Steps.
Is mold behind wallpaper dangerous
Mold exposure may cause allergic reactions, stuffy nose, red or itchy eyes, and can worsen asthma. Some molds produce mycotoxins. Sensitive people and large areas require professional help. See CDC guidance.
How big is too big for DIY cleanup
The EPA suggests calling a professional for areas larger than roughly 10 square feet or when mold is hidden within walls or in HVAC systems. See EPA size threshold.
What if the smell returns after cleaning
That usually signals an active moisture problem or missed contaminated material. Check ventilation, humidity, and look for hidden leaks. If it persists, schedule an inspection with a certified remediator. Our team can provide an assessment and moisture mapping.
Should I use bleach on drywall
Bleach can irritate lungs and skin and is not a reliable solution on porous materials like drywall. Focus on removal of damaged porous materials and damp cleaning of hard surfaces. The CDC offers warnings about chemical use at CDC Mold Cleanup.
Does wallpaper have to come off to fix the problem
Yes for mold that is behind the paper. Leaving wallpaper in place traps the colony and moisture. Removal allows proper cleaning and drying. If you plan to keep wallpaper in the future, choose breathable products and manage humidity.
Ready for help in Austin
If you suspect mold behind wallpaper, do not wait. The faster we fix the moisture problem, the better your outcome. My crew is trained to set up containment, run HEPA filtration, remove contaminated materials, and dry your structure so you can rebuild with confidence. For rapid service, visit our mold removal services page for 24 slash 7 help. If your walls are peeling, warped, or you suspect black mold, see our professional mold removal guide for signs that call for a pro.
I built this company to protect families and businesses in central Texas. If you want a fast inspection for hidden mold behind wallpaper or a second opinion on a recurring problem, call us today. We will check moisture sources, explain the findings in clear terms, and recommend a safe plan to remove mold under wallpaper without spreading spores.
Sources and further reading. EPA mold basics and cleanup steps at EPA Mold. EPA cleanup steps at Basic Cleanup Steps. EPA training module at Mold Course Chapter 4. CDC cleanup and PPE at CDC Mold Cleanup. IICRC S520 standard page at IICRC S520. All Nation Restoration resources on hidden mold and mold removal services.